9 Different Use Cases of console.log
Every one of us has used console.log for debugging more than we care to admit. I use it multiple times a day to verify my changes but mostly do this with only console.log. Yet the console API provides way more functionality than that — more functionality than most of us are aware of.
We can use it not just for logging, but also to debug performance issues or to validate changes with assertions. This article is a collection of nine different use cases of the console API that can help you with debugging on top of console.log.
Let’s start at the very beginning with the simple things we all know: log levels.

1. Log Levels
We all know and use console.log, but there are some other levels out there. Let’s go in order of severity, starting from debug. The debug method outputs a message to the console at the debug log level.

Looking at the GIF above, you can already see the different available log levels. By default, Verbose is checked off — hence you won’t see a debug log until it’s checked. The same is true for the other three.
The next level, which is info, is responsible for handling console.info. If you uncheck info, both console.info and console.log will be hidden. The two are equivalent. Warnings and errors, however, will be styled differently.

As you can see, there’s no visual difference between console.log and console.info. Both can be used for logging out general information.
You should use warn when things don’t go right in your application, but it can still recover automatically and doesn’t affect operation. While error should be used in case it affects user flow and can cause your application to crash and come to a halt.
2. Dir and DirXml
If you need further debugging capabilities, dir and dirxml might be what you’re looking for.
Both are used for displaying an interactive list of an object. Let’s see some examples. Say you want to log out the properties of a DOM element. Clearly, if you use console.log, you get the HTML representation. This is the case when you use console.dirxml as well. As the name suggests, it displays the XML or HTML representation of the object you specify.
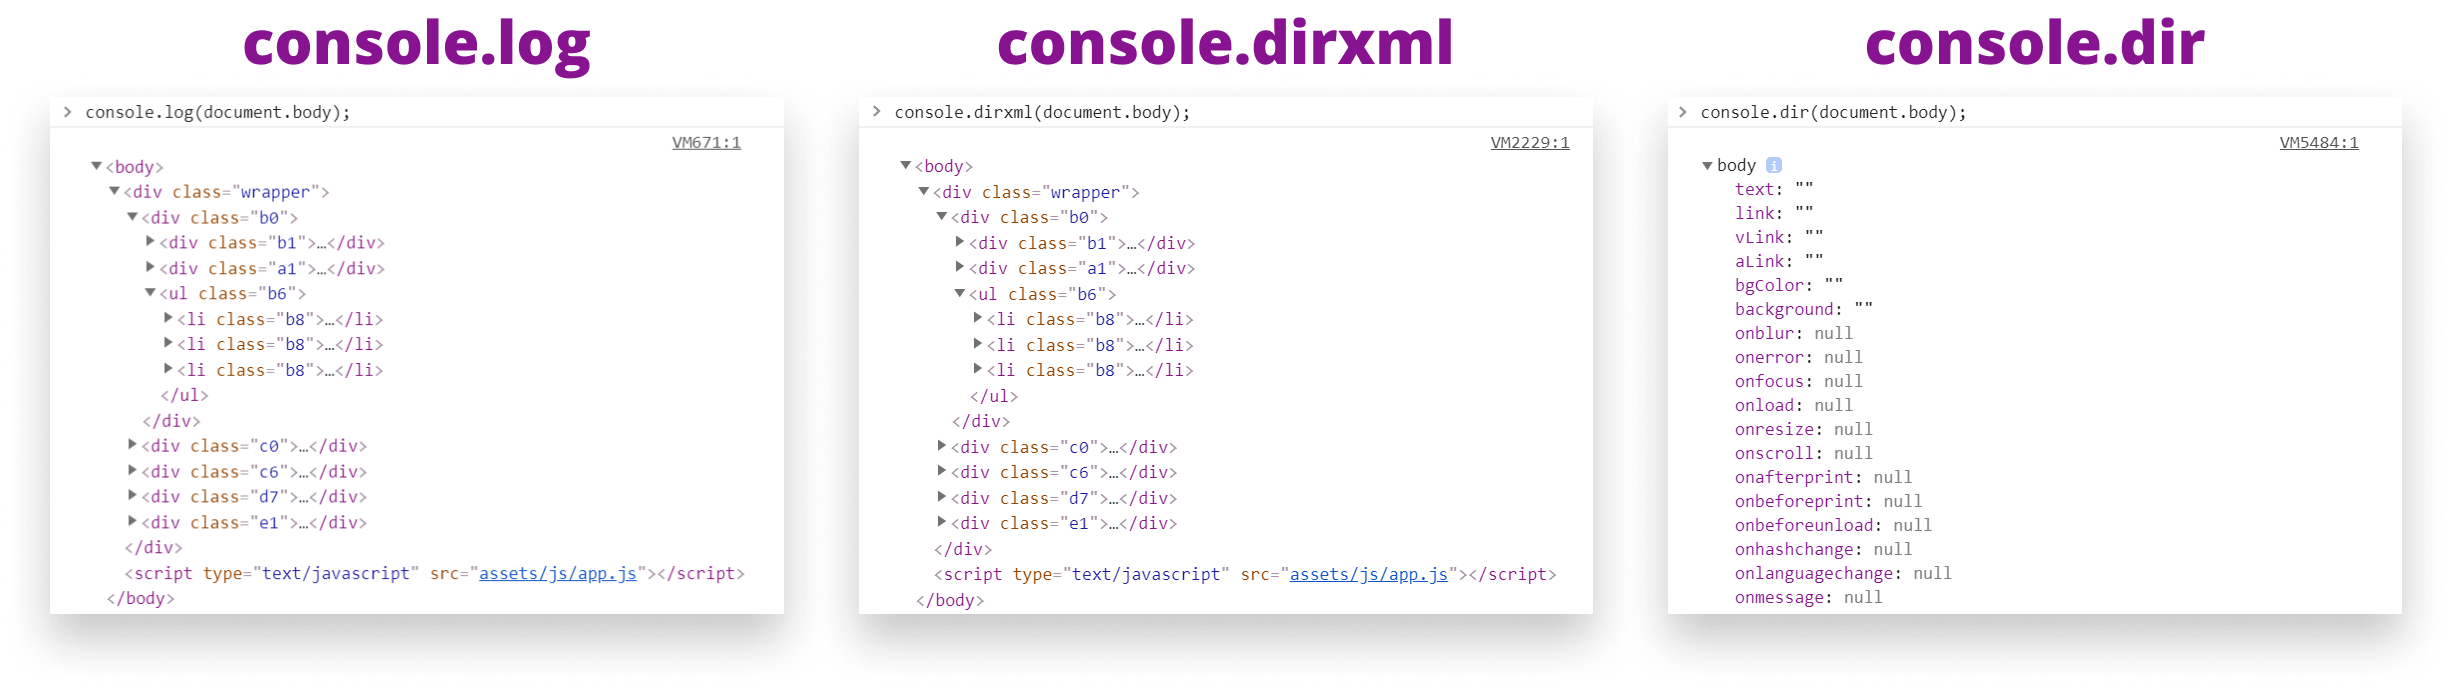
But not with console.dir. As you can see from the example above, in this case, log and dirxml are identical. But console.dir logs out the body in a JavaScript object representation.
What are some other cases? There are certain objects which log stringifies. The best example would be a regex:

While log only outputs a string representation of the expression, with dir we get all the available properties on the object.

3. Formatting
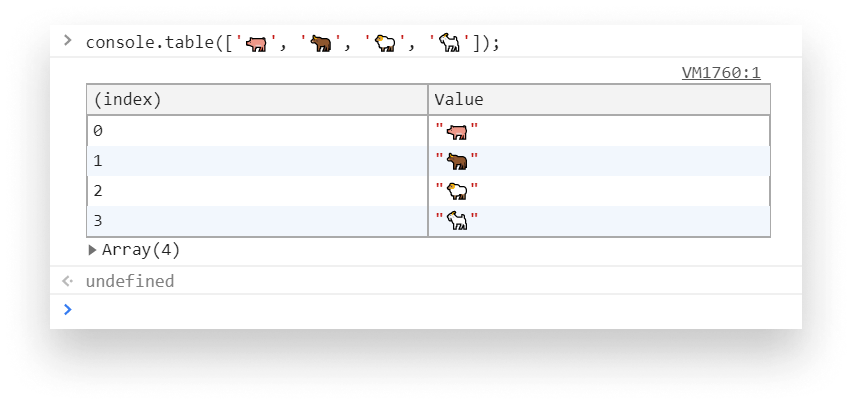
If the previous examples still don’t fulfill your needs, there are further formatting options you can go with. One of them is console.table. It display the passed data — which can be either an array or an object — in a table.
And if you want your messages to really stand out because you can’t find the one you’re looking for in the sea of console messages, then you can specify CSS styles as the second argument of console.log.
The first argument, which is the message you want to log out, must contain %c. Everything that comes after this special placeholder will get the styles.

4. Grouping
Speaking of getting lost among the logs, you can also group messages to save some space and make your console more readable. Take a look at the following example and its result:

In case it makes thing hard to read for you and your console becomes cluttered, we can also use the groupCollapsed method to output the group as collapsed by default:

5. Assertions
Now that we have everything logged out and we managed to understand how our implementation works, it’s time to also test them to make sure they work as intended.
This is what console.assert is for. It expects an assertion, and if it’s evaluated to false, it prints out the stack trace to the console.
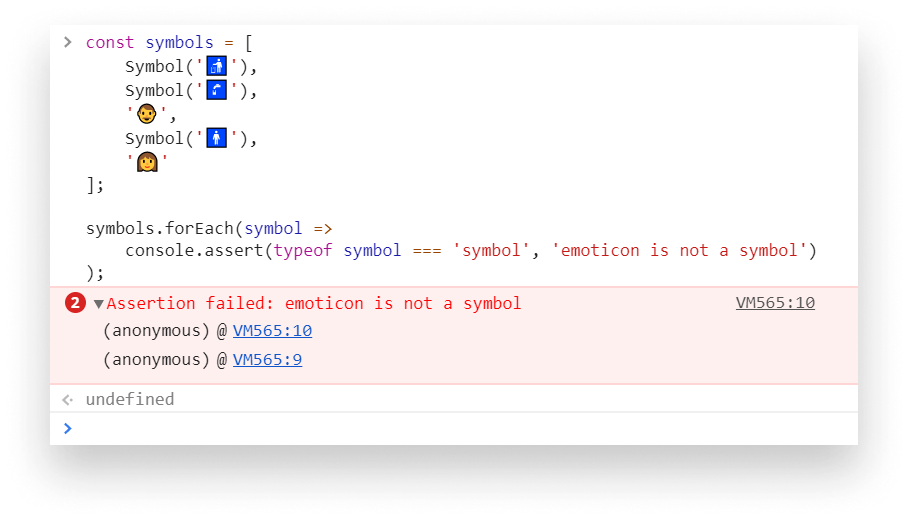
As you can see from the example above, we have two elements in the array that aren’t symbols. This is caught by the assertion. Anything that passes won’t print to the console — except the failed assertions.
6. Debugging
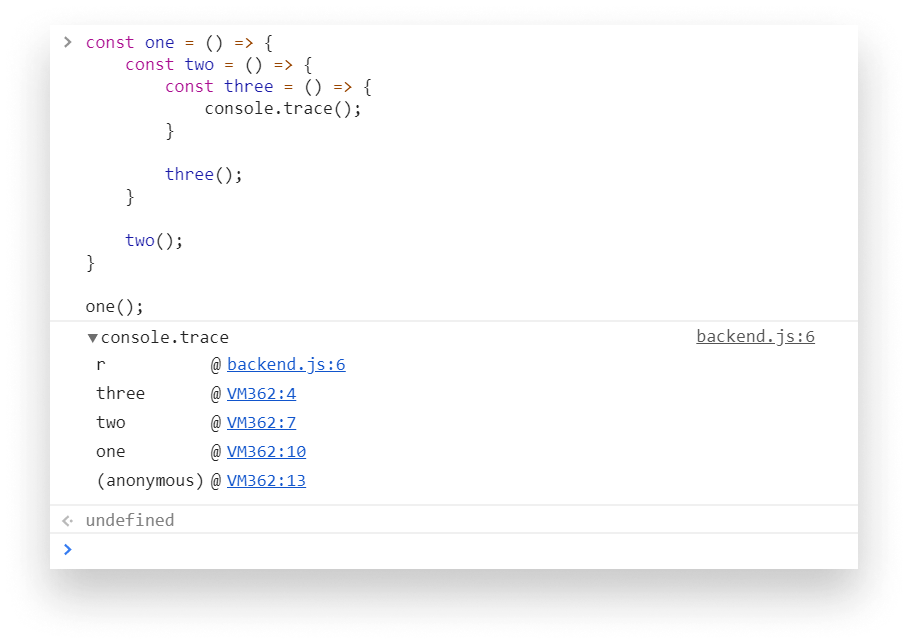
We used assertions and see how everything failed. We need a way to debug things. For debugging purposes we can use console.trace. It is used for displaying a stack trace:
Also, if you’re suspecting you have memory issues, such as memory leak, you can print out the memory usage using console.memory.

7. Monitoring Performance
We’ve successfully debugged the issue, and now everything seems to work just fine — except the response time is really long.
So you want to measure performance. You think it’s because of a for loop you implemented earlier to populate the page with chickens. To measure performance, we can use console.time.

By calling console.time with a name and then calling console.timeEnd with the same name and the operation in between, we can measure the time it takes for the loop to run.
If you’d like to log out the time every now and then at certain intervals, you can also use timeLog.

Calling timeLog will log out the current value of the time.
8. Countdown
And now we’re reaching the end of this list, so let’s count down — or rather up — before wrapping everything up.
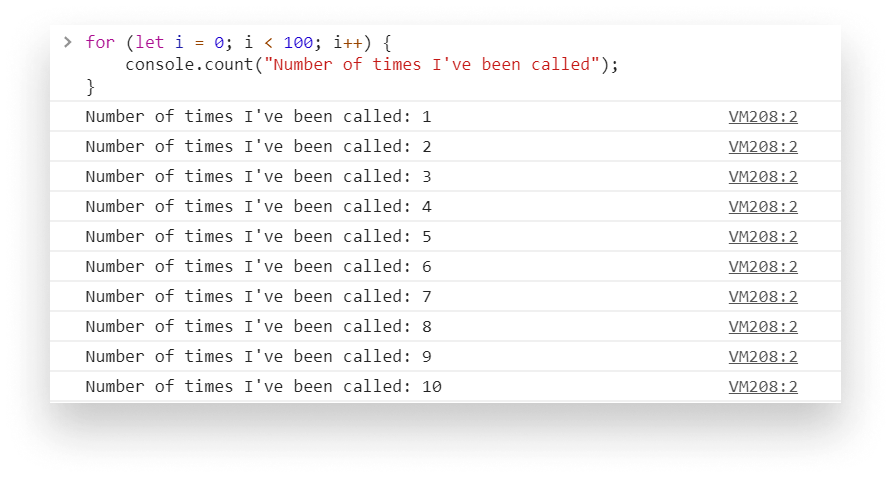
count expects a label as a parameter.
This label will get printed out alongside the number of times it’s been called. This is useful if you want to know how many times a function has been called or a component has been rendered. If you’d like to reset the counter and start over again, you can use countReset.

9. Beginning With a New Page
Finally, to let go of everything we did so far and start with a blank slate, let’s use console.clear to get rid of the mess we’ve made.
Hope you have learned new things. If you’ve reached this far, thank you for your time. Now it’s time to have a break and play with a real console. 🕹️

Rocket Launch Your Career
Speed up your learning progress with our mentorship program. Join as a mentee to unlock the full potential of Webtips and get a personalized learning experience by experts to master the following frontend technologies:
Courses


Recommended