How to Create Native Drag and Drop Functionality in JavaScript
Learning React? Check out how you can achieve the functionality using hooks.
Drag and drop functionality is a common feature. It creates a more intuitive user flow by letting users grab and drop objects to places where they want them to be. There are countless of JavaScript libraries out there just for this purpose. Including one for every possible framework. However, this can be done quite simply with the native Drag and Drop API. This is what we will take a look at.
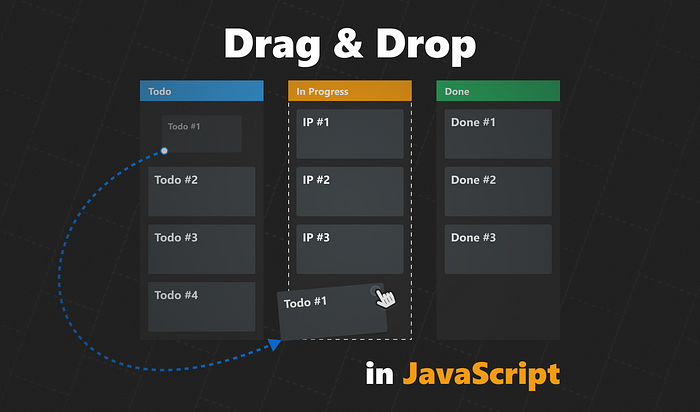
At the end of this tutorial, you will learn how to create the following drag and drop functionality for a Kanban board:

Setting Up the DOM
Let’s start by setting up the DOM first. Create an index.html file at your project’s root folder and add the following:
<main class="board">
    <div class="column column-todo">
        <h2>Todo</h2>
        <article class="card">
            <h3>Todo #1</h3>
        </article>
        <article class="card">
            <h3>Todo #2</h3>
        </article>
        <article class="card">
            <h3>Todo #3</h3>
        </article>
    </div>
    <div class="column column-ip">...</div>
    <div class="column column-done">...</div>
</main>

<script src="drag-n-drop.js"></script>The same structure will be true for the other two columns, “In Progress” and “Done”. As you can see, at the end of the body the drag-n-drop.js will handle the Drag & Drop functionality.
Adding drag and drop attributes
In order to work with Drag & Drop, however, we first need to decorate our DOM tree with additional attributes.
<div class="column column-todo" ondrop="drop(event)" ondragover="allowDrop(event)">
    <h2>Todo</h2>
    <article class="card" draggable="true" ondragstart="drag(event)" data-id="1">
        <h3>Todo #1</h3>
    </article>
    <article class="card" draggable="true" ondragstart="drag(event)" data-id="2">
        <h3>Todo #2</h3>
    </article>
    <article class="card" draggable="true" ondragstart="drag(event)" data-id="3">
        <h3>Todo #3</h3>
    </article>
</div>The other two columns will get the exact same attributes. Except for data-id. We need to have a unique ID for each article. This is what will use as a hook in JavaScript. Let’s see what each of the attributes are doing:
ondrop: This event will be fired when we drop an element on a valid drop target. This is where we want to handle dropping functionality.ondragover:Whenever we drag an item over a drop area, this will gets fired, every few hundred milliseconds. Since this is called a lot, it’s important that we avoid placing calculation-heavy functions here.draggable: This attribute sets whether an element can be dragged.ondragstart: This event will be fired when a user starts to drag an element.data-id: Will be using this attribute for identification. Every draggable element needs to be identifiable in some way. It’s recommended to either use ids or custom data attributes for this. In any case, each entry needs a unique name.
At this stage, the elements are now draggable. With the help of some CSS, we can set up different cursor icons to indicate whenever we grab an item.
Dragging Elements
Now that we have everything set up, we can start writing the functionality for dragging elements. First, you should always provide some visual feedback to the user about an action. When the user drags an item, we want to indicate that.
We can do this by adding an extra class to the element when we want to move it. To do that, add the following functions to your drag-n-drop.js:
const dragStart = event => {
    event.currentTarget.classList.add('dragging');
};

const dragEnd = event => {
    event.currentTarget.classList.remove('dragging');
};

document.querySelectorAll('.card').forEach(card => {
    card.addEventListener('dragstart', dragStart);
    card.addEventListener('dragend', dragEnd);
});This will add two event listeners to each card. Note that in order to use array methods, you may have to convert the NodeList you get back from querySelectorAll, to an array. At the time of writing, support is around 93%. And what do these events do?
dragstart: This event will be fired when the user starts dragging an item.dragend: This event will be fired when the user stops dragging the item. This means, the user either released pressing a mouse button or the Esc key was hit.
And what does the dragging class does to the card? It sets the opacity and the scale to 80%.
.card {
    transition: all 0.3s cubic-bezier(0.4, 0.0, 0.2, 1);
}

.card.dragging {
    opacity: .5;
    transform: scale(.8);
}What will make drag and drop work?
While here, let’s also set up the drag function which will be fired on every dragstart event. The sole responsibility of this function is to set up some data that we can later use when the item is dropped.
const drag = event => {
    event.dataTransfer.setData('text/html', event.currentTarget.outerHTML);
    event.dataTransfer.setData('text/plain', event.currentTarget.dataset.id);
};The dataTransfer object can hold data about the dragged object. The setData method takes two parameters: a mime-type and a payload. Here we want to store the HTML content of the dragged element as well as its id. To make things work, we want to:
- Add this HTML to the new column when we drop it. We will use the
outerHTMLcontent for this. - Remove the original element from the original column. We will use the
idfor this.

Dropping Elements
Now we can move onto dropping the items. Again, let’s start first by adding some visual cues to the user when they drag the card over a column.
const dragEnter = event => {
    event.currentTarget.classList.add('drop');
};

const dragLeave = event => {
    event.currentTarget.classList.remove('drop');
};

document.querySelectorAll('.column').forEach(column => {
    column.addEventListener('dragenter', dragEnter);
    column.addEventListener('dragleave', dragLeave);
});This time, we want to use the dragenter and dragleave events. Very similar to dragstart and dragend, but they have different purposes.
dragenter: This event will be fired when a draggable element enters a valid drop area.dragleave: This event will be fired when a draggable element leaves a valid drop area.
From CSS side, we need to set transition again, as well as adding a dashed border.
.column {
    transition: all 0.3s cubic-bezier(0.4, 0.0, 0.2, 1);
}

.column.drop {
    border: 2px dashed #FFF;
}

.column.drop article {
    pointer-events: none;
}Another important thing is to remove the pointer-events from the cards. This will let the column receive all events and get the dashed border, even if we drag the card over another card.
All that’s left to do is to actually add the items to the new column. For this, we will need two extra functions:
const drop = event => {
    document.querySelectorAll('.column').forEach(column => column.classList.remove('drop'));
    document.querySelector(`[data-id="${event.dataTransfer.getData('text/plain')}"]`).remove();

    event.currentTarget.innerHTML = event.currentTarget.innerHTML + event.dataTransfer.getData('text/html');
};

const allowDrop = event => {
    event.preventDefault();
};The allowDrop function is used for preventing the default behavior of the browser, so we can actually drop the item into the column.
In the drop function, we first want to remove the drop class from everywhere (which is responsible for the dashed border). Then we can use the data we set with dataTransfer.setData. In order:
- We remove the original card that we select based on its
data-idattribute. - We append the new card to the end of the column.
Summary
And that’s it! You’ve just created your very first Kanban board with drag and drop functionality. If you would like to learn more about the native drag and drop API, make sure to check out the official docs of MDN web docs. It includes all available drag events that you can use in different phases of the drag and drop lifecycle.
If you would like to play around with the finished product, you can clone it from this GitHub repository. Have you used the Drag and Drop API before? Let us know your thoughts in the comments down below! Thank you for taking the time to read this article, happy coding!

Rocket Launch Your Career
Speed up your learning progress with our mentorship program. Join as a mentee to unlock the full potential of Webtips and get a personalized learning experience by experts to master the following frontend technologies:
Courses


Recommended
How to Connect CircleCI With Netlify

10 Best Practices for Quickly Improving Your CSS