How to Make Your Very First Desktop App With Electron and Svelte
Electron is a powerful tool for creating cross-platform desktop applications. In combination with Svelte, you can build highly scalable, reactive apps using nothing more than languages you already know. That is HTML, CSS, and JavaScript.
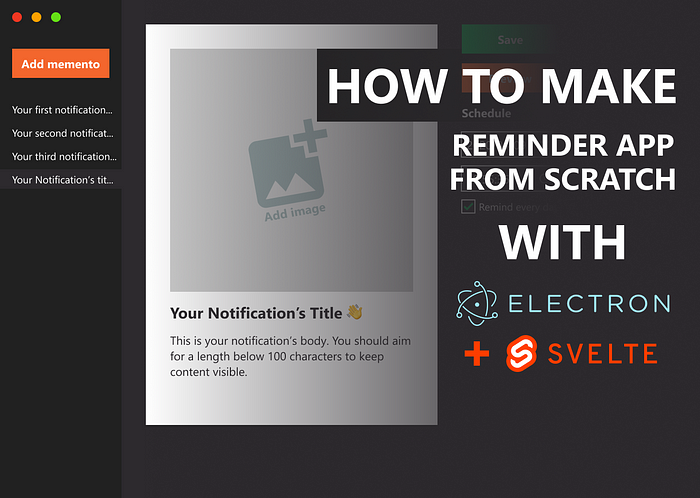
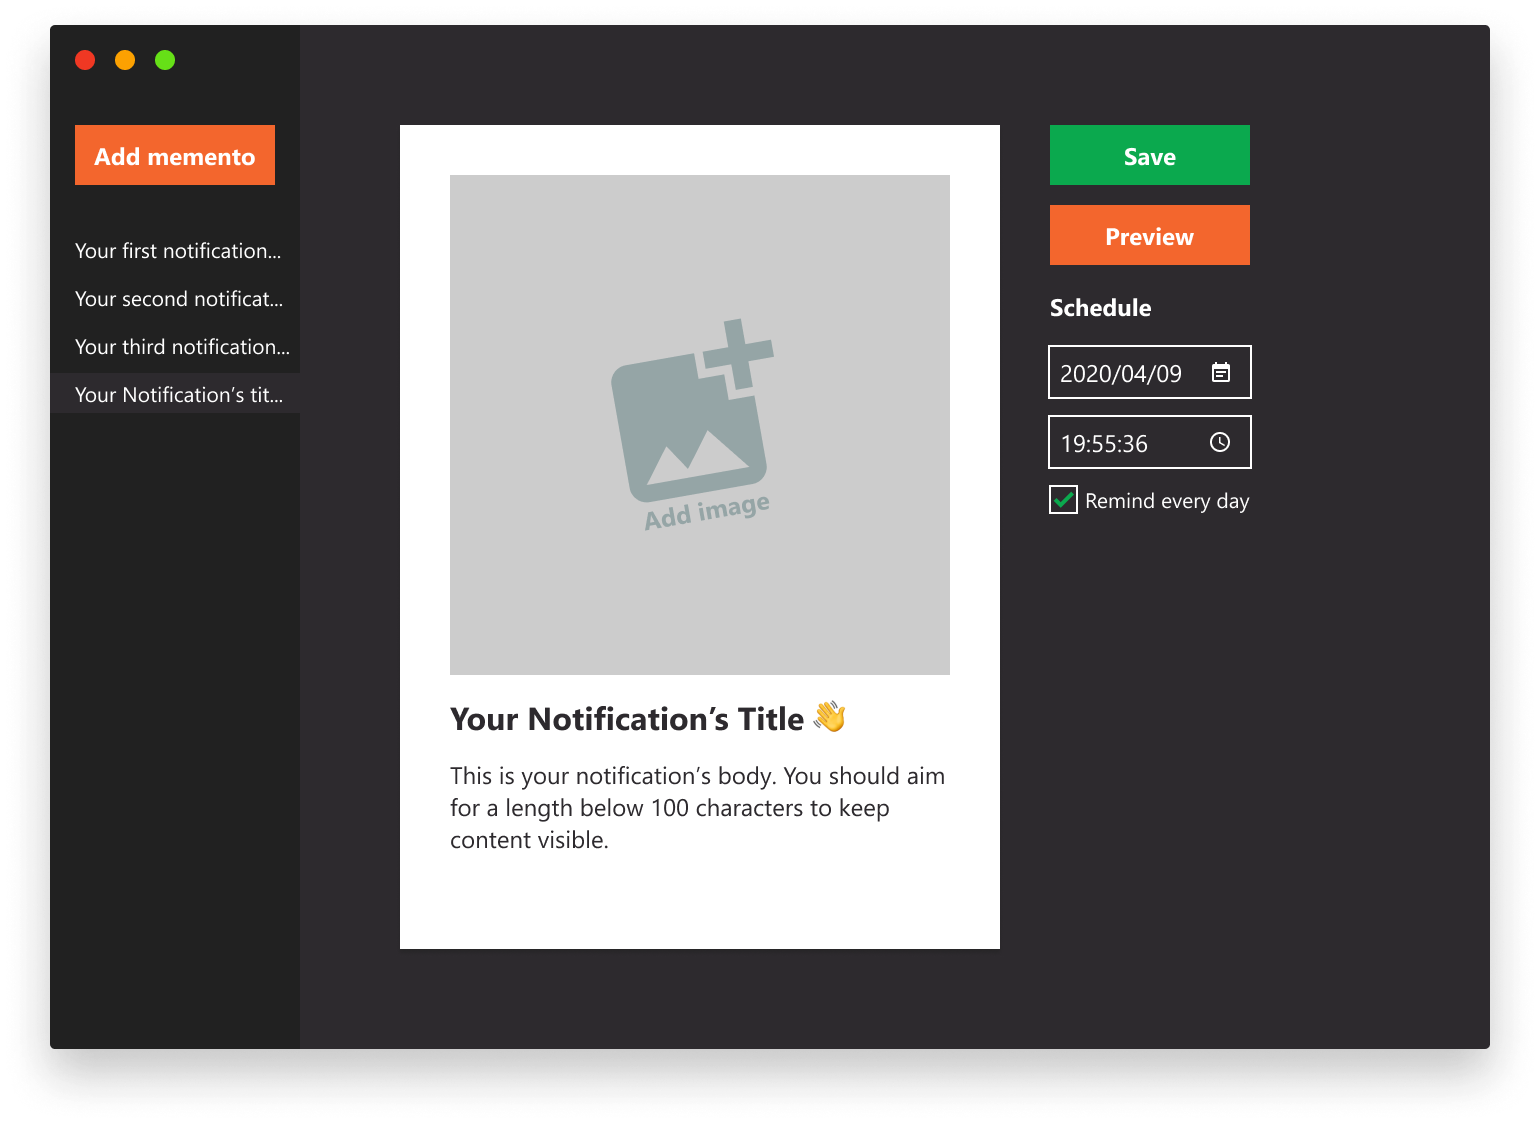
We will take both to the test today and build a reminder, that will send out push notifications. You’ll be able to create, delete, or modify them to your taste. This is the mockup for the application:

What is Electron?
Electron — originally created for the Atom editor — is an open-source framework developed by GitHub. It allows us to create desktop applications using nothing more, but only web technologies. You can write your apps in HTML, CSS, and JavaScript. It achieves this by combining the Chromium rendering engine with Node.js. Essentially, we have a browser window that runs as a separate application.
Setting Up Svelte
As we are mainly going to work in Svelte and Electron will only be a wrapper, let’s start with the former. Once configured, we will later set up Electron around it. Run npx degit sveltejs/template to initialize an empty Svelte project. Then run npm i to install dependencies. Alternatively, you can also download the zip file from GitHub.
Adding SCSS support
While here, let’s also add SCSS support. Run npm i rollup-plugin-scss. Then open the Rollup config file and add these two new lines:


Setting Up Electron
The next step is to set up Electron. Run npm i electron, then add an index.js file to your project root folder. This will be the entry file for our app’s window.
const { app, BrowserWindow, screen } = require('electron');

const createWindow = () => {
    const { width, height } = screen.getPrimaryDisplay().workAreaSize;

    window = new BrowserWindow({
        width: width / 1.25,
        height: height / 1.25,
        webPreferences: {
            nodeIntegration: true
        }
    });

    window.loadFile('public/index.html');
};

let window = null;

app.whenReady().then(createWindow)
app.on('window-all-closed', () => app.quit());The important parts here are line:9 and line:14. In order to use node inside the app, we need to enable nodeIntegration. At the end of the function, we set the index file to point at the public directory. This is where Svelte will generate the assets for us.
To start things up, change the start script inside your package.json file to the following, then run npm run start.
 {
     ...
     "scripts": {
       "build": "rollup -c",
       "dev": "rollup -c -w",
-      "start": "sirv public"
+      "start": "electron ."
     },
     ...
}This will open up an empty window. Nothing shows up. Something is broken. To open up DevTools, go to View → Toggle Developer Tools, or hit ctrl + shift + i.
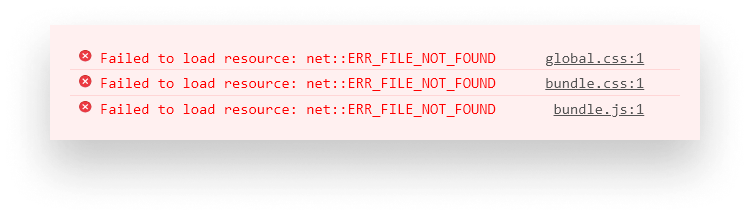
We need to change the paths of the assets. Go to your index.html file and add a dot in front of them.
 <!DOCTYPE html>
 <html lang="en">
     <head>
         <meta charset='utf-8'>
         <meta name='viewport' content='width=device-width,initial-scale=1'>

         <title>Svelte app</title>

         <link rel='icon' type='image/png' href='/favicon.png'>
-        <link rel='stylesheet' href='/global.css'>
-        <link rel='stylesheet' href='/build/bundle.css'>
+        <link rel='stylesheet' href='./global.css'>
+        <link rel='stylesheet' href='./build/bundle.css'>

-        <script defer src='/build/bundle.js'></script>
+        <script defer src='./build/bundle.js'></script>
    </head>

    <body>
    </body>
</html>If you restart the app, now you should see a “Hello World!” showing up.

Unfortunately, if we make some changes, we don’t see any updates. This is because we only started electron not Svelte through Rollup. This can be remedied by running npm run dev instead of npm run start.
It’s important that we have elecron . as our start script. If you look at your Rollup config, you’ll see that in the end, it will spawn a child process. It will call npm run start.
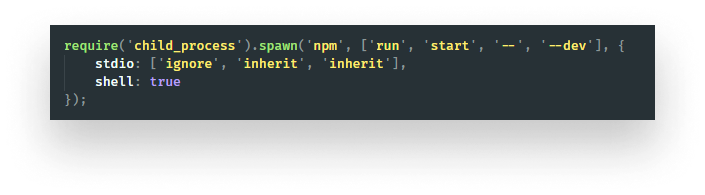
So even though we start the default Svelte dev environment with npm run dev, electron will also start with it. And this is what we are looking for.
However, if you try to make any changes, you’ll need to restart electron to see it. Let’s get around this by adding hot reload.
Adding hot reload
Install the electron-reload module by running npm i electron-reload. Inside your index.js file, just after the first line, add the following:
require('electron-reload')(__dirname);This will reload electron any time there is a change in the project folder.
Setting Up the Store
In our app, we will separate the view into two modules. A sidebar and a main window. Yet we want to have a single source of truth, only one global state. In Svelte, if you want to share the same state across different components, you can use stores among other options.
A store is nothing more than an object with a subscribe method that allows components to be notified whenever a value changes inside the store. In the root of your src folder, add a store.js file with the following content:
import { writable } from 'svelte/store'

export default writable([]);This will create a writable store for us, with an initial value of an empty array. This is where we will store information about each notification.
Creating The Sidebar
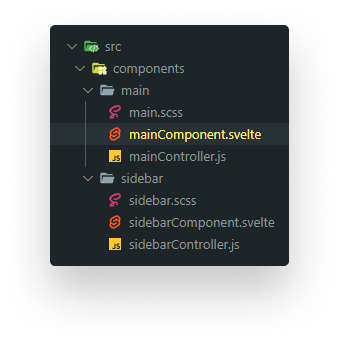
Component-wise, let’s start with the sidebar. Create a components folder inside your src folder and create a sub-folder for the sidebar. Inside this, create a new component called sidebarComponent.svelte. You can also import it into App.svelte right away.
<script>
    import Sidebar from './components/sidebar/sidebarComponent.svelte';
</script>

<Sidebar />Apart from the five lines above, you can delete everything else. Moving on to the sidebar component, fill it with the following content:
<script>
    import sidebarController from './sidebarController.js';
    import mementoes from '../../store.js';
    import './sidebar.scss';
</script>

<div class="sidebar">
    <button class="add-memento" on:click={sidebarController.addMemento}>Add Memento</button>

    <ul class="mementoes">
        {#each $mementoes as memento}
            <li class="memento-item" class:active={memento.active}
                on:click={() => sidebarController.selectMemento(memento.id)}>
                {memento.title}
            </li>
        {/each}
    </ul>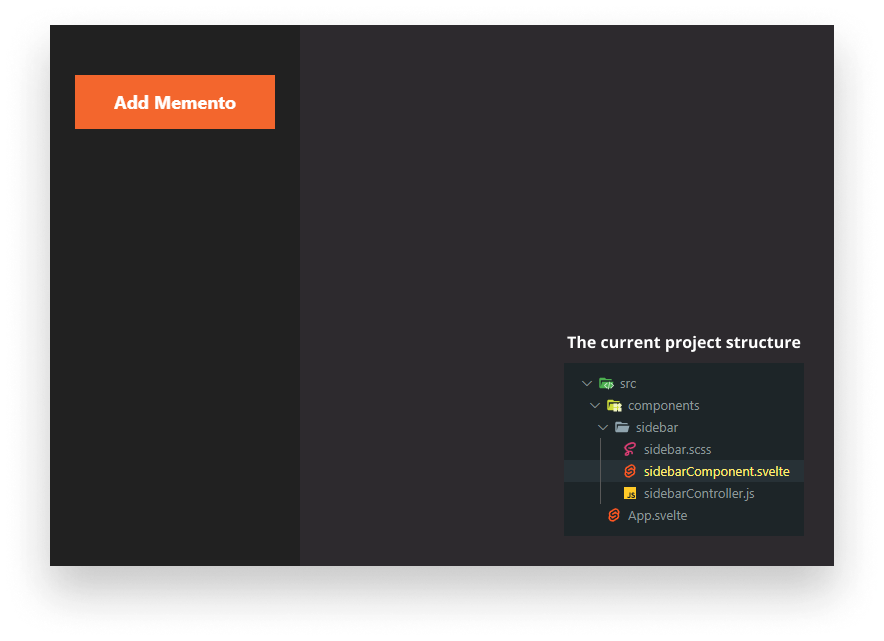
</div>To reduce the amount of script in the template, I’ve created a controller next to the component. I’ve also added some CSS and imported the store. You can see that in the #each loop, I prepended the variable with a dollar sign. This tells Svelte to treat the value as reactive and update the DOM whenever changes are made to it.
For each memento, we want to display a list item. You can see that if the item is active, we will add an active class to the li. This is equivalent to saying:
<li class={memento.active ? 'memento-item active' : 'memento-item'}>The only purpose of the selectMemento method is this: once the item is clicked, it sets it as active. With the help of some CSS, this is what we have so far:
Adding the sidebar controller
For the controller, we will have two methods. One for adding mementoes and another one for setting the active state.
import mementoes from '../../store.js';

export default {

    addMemento() {

    },

    selectMemento(id) {

    }
}To use the store, we need to import it here as well. Let’s first start with the addMemento method.
addMemento() {
    mementoes.update(memento => [...memento, {
        id: memento.length ? memento[memento.length - 1].id + 1 : 0,
        icon: null,
        title: 'Your Notification\'s Title 👋',
        message: 'This is your notification’s body. You should aim for a length below 100 characters to keep content visible.',
        settings: {
            date: new Date().toISOString().split('T')[0],
            time: '12:00',
            repeat: false
        }
    }]);
}To update a store in Svelte, we have to use store.update. It accepts a callback function with the current state, in this case in the form of memento. What we return from the function will be the new state.
Since we want to essentially push a new object to the array, while also keeping existing items, we can use the spread operator on the current state. The object will be the new item we add.
You can see that every notification has a total of 7 properties. Such as their day and time or whether to repeat the notification every day.
Now we can add as many mementoes as we want, but we can’t select them. Let’s quickly fix it. Add the following for the selectMemento method.
selectMemento(id) {
    mementoes.update(mementoes => {
        return mementoes.map(memento => {
            if (memento.id === id) {
                memento.active = true;
            } else {
                delete memento.active;
            }

            return memento;
        });
    });
}Again, we need to use store.update. We can use a simple map function to modify the active state of the one where the id matches. For everything else, we want to get rid of the active state. We can only have one active item at a time. Now we should have no problem selecting a memento.

Creating The Main Frame
That’s all for the sidebar. Our next step is to actually make them editable. Create a new folder called main next to the sidebar. Just like for the sidebar, we will have three different files. One for the component, one for the controller, and another one for the styles.
You can import it into App.svelte, right after the sidebar.
<script>
    import Sidebar from './components/sidebar/sidebarComponent.svelte'
    import Main from './components/main/mainComponent.svelte'
</script>

<Sidebar  />
<Main />Let’s take a look at what we have inside the template.
<script>
    import mainController from './mainController.js';
    import mementoes from '../../store.js';
    import './main.scss';
    $: memento = $mementoes.find(memento => memento.active);
</script>

<main>
    {#if memento}
        <div class="memento-wrapper">
            this is where everything will go
        </div>
    {:else}
        <span class="no-data">🔘 Select or create a memento to get started</span>
    {/if}
</main>Apart from the imports, we also have an additional line in the script tag. We define the active memento we want to use throughout the template. Here we use the dollar sign again to make the declaration reactive.
We will use this to decide if we have an active memento. If so, we can display the controls. Let’s start with the card first.
Adding the layout for the notification card
Inside memento-wrapper add the following content:
<div class="memento">
    <div class="memento-image-holder">
        {#if memento.icon}
            <img class="memento-image" src={memento.icon} alt="" />
            <button class="remove-image" on:click={removeImage}>❎</button>
        {:else}
            <img src="img/image-placeholder.png" alt="" />
            <input class="file-upload" type="file" on:change={uploadImage} />
        {/if}
    </div>
    <h1 class="memento-title" contenteditable="true" bind:textContent={memento.title}> </h1>
    <div contenteditable="true" bind:innerHTML={memento.message}></div>
    <button class="delete" on:click={deleteMemento}>❌</button>
</div>This creates a white card for the notification. We have a couple of controls. First, we have an if, checking if we have an icon associated with the memento. Inside the if we have two methods. One for removing and one for uploading the image.
We also have some bindings. Editable contents flagged with contenteditable supports the use of textContent and innerHTML bindings. And lastly, we have a delete button.
If you go ahead and create a memento and click on it, you’ll be now greeted with a card.
Handle images
Let’s start implementing the functionality by first handling the images. Inside your script tags, add two new functions.
<script>
    ...
    $: memento = $mementoes.find(memento => memento.active);
    const uploadImage = (e) => {
        memento.icon = e.target.files[0].path;
    }
    const removeImage = () => {
        memento.icon = null;
    }
</script>The first will be called whenever we choose an image. The second will be triggered by a click event. Since memento is reactive, the rendering will be handled for us by Svelte.

Removing memento
Only the remove functionality is missing from this part. Add this new function between your script tags:
<script>
    ...
    const deleteMemento = () => {
        mementoes.update(currentMementoes => {
            return currentMementoes.filter(currentMemento => currentMemento.id !== memento.id);
        });
    }
</script>Since we are changing the state of the store, we need to call update. All we have to do is return a new array where we filter out the id of the selected memento.
Now we can move onto implementing the settings and sending out notifications.
Adding the settings template
After your memento div, extend the component with the following template:
<script>
    ...
</script>

<main>
    {#if memento}
        <div class="memento-wrapper">
            <div class="memento">...</div>
            <div class="actions">
                <button class="button save-button" on:click={() => mainController.save(memento)}>Save</button>
                <button class="button preview-button" on:click={() => mainController.preview(memento)}>Preview</button>
                <div class="options">
                    <span class="date-time-title">Schedule</span>
                    <input type="date" bind:value={memento.settings.date} />
                    <input type="time" bind:value={memento.settings.time} />

                    <label class="repeat">
                        Remind every day
                        <input type="checkbox" bind:checked={memento.settings.repeat} />
                        <span class="input"></span>
                    </label>
                </div>
            </div>
        </div>
    {:else}
        <span class="no-data">🔘 Select or create a memento to get started</span>
    {/if}
</main>To handle changes of different properties, we can use bindings once more. To bind checkboxes you can use the bind:checked directive. We also have two functions. But this time, they are coming from the controller. Let’s look at how we can preview notifications.
Preview notifications
For this, we will need to pull in a new module. Run npm i node-notifier. This will let us use push notifications. Include it in your main controller and add the following function for preview:
const notifier = require('node-notifier');

export default {
    preview(memento) {
        notifier.notify({
            title: memento.title,
            message: memento.message,
            icon: memento.icon
        });
    }
}This will create a push notification with the properties of the currently selected memento. Let’s try it out.
As you can see, bindings automatically update the values of the properties. We don’t need to implement any custom functionality to update the title or the body.
Saving memento
All that’s left to do is to save the memento so we can schedule it for a later day. For this, we are going to use cron jobs. If you are unfamiliar with cron jobs, you can check out my tutorial on how you can schedule tasks with it.
To use cron jobs in node, run npm i cron, and include it as well into your controller.
+ const cronJob = require('cron').CronJob;
  const notifier = require('node-notifier');

  export default {
      preview(memento) {
          notifier.notify({
              title: memento.title,
              message: memento.message,
              icon: memento.icon
          });
      },

+     save(memento) {
+         console.log(memento);
+     }
}Now if you go ahead and add the save method right after preview and log out the memento we pass as the parameter, you’ll notice that we have a proper time and date. However, we want to convert this to a cron pattern.

Generating cron job patterns
To do this, let’s create a new function into the controller that we can use.
const generateJobPattern = (date, time, repeat) => {
    const timeArray = time.split(':');
    const dateArray = date.split('-');
    const month = dateArray[1] === '01' ? '0' : dateArray[1] - 1;

    return `0 ${timeArray[1]} ${timeArray[0]} ${repeat ? '*' : dateArray[2]} ${month} *`
};

export default {
    preview(memento) { ... },
    save(memento) {
        const pattern = generateJobPattern(
                            memento.settings.date,
                            memento.settings.time,
                            memento.settings.repeat
                        );
    }
}Luckily for us, all we have to do is split up the strings and concatenate the different parts to get the desired pattern. Then we can call this function inside the save method with the proper parameters.
The next step is to actually schedule the job. We will need an array where we can hold individual cron jobs. We also want to ensure that if we click the save button more than once on the same memento, we don’t add a new job but rather update the existing one. To achieve this, extend the save method with the following:
// Each cron job will be stored inside this array
let jobs = [];

save(memento) {
    ...

    const jobExist = jobs.find(job => job.id === memento.id);

    if (jobExist) {
        jobs = jobs.map(job => {
            if (job.id === memento.id) {
                job.pattern = pattern;
                job.title   = memento.title;
                job.message = memento.message;
                job.icon    = memento.icon;
            }

            return job;
        });
    } else {
        jobs.push({
            id: memento.id,
            pattern,
            title: memento.title,
            message: memento.message,
            icon: memento.icon
        });
    }
}First, we need to tell if the job exists. This can be done quite simply by looking for an id that matches the one we pass into the function. If it is, we can update every property of the job. Otherwise, we can push a new job into the array.
Scheduling jobs
Lastly, we need to actually start the cron jobs. For this, I’ve created a separate function and a new array, outside of the save method.
let cronJobs = [];

const scheduleJobs = () => {
    cronJobs.forEach(job => job.stop());
    cronJobs = [];

    jobs.forEach(job => {
        cronJobs.push(
            new cronJob(job.pattern, () => {
                notifier.notify({
                    title: job.title,
                    message: job.message,
                    icon: job.icon
                });
            })
        )
    });

    cronJobs.forEach(job => job.start());
};This will first stop all running jobs. Empty out the array and create new ones, based on the jobs we make with the save method. For each job, we create a new cronJob with the pattern and the properties. Such as the title, message, or icon. At the end of the function, we can restart them. You can call this function as a very last step inside the save method.
Final Touches
And we are basically done. Let’s add a couple of final touches to electron to finish things up. First, we want to remove the application menu and prevent DevTools from being opened.

Go back to your index.js file and add the following:
// Also add Menu to the imports
const { app, BrowserWindow, Menu, screen } = require('electron');

const createWindow = () => {
    // Add it as the first things inside your `createWindow` function
    Menu.setApplicationMenu(false);

    ...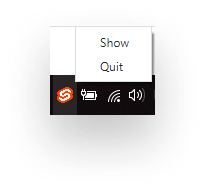
}Hide application in system tray
Lastly, let’s also hide the application in the tray. We don’t want the app to take up the screen all the time. But we still want it to run it in the background so the notifications can be sent out. To do this, we have to hook into the minimize and close events of electron. Add two new event listeners inside your createWindow function.
window.on('minimize', e => {
    e.preventDefault();
    window.hide();
});

window.on('close', e => {
    e.preventDefault();
    window.hide();
});This will prevent the application from being closed and will only hide the window. The only problem is that we can’t restore it. So let’s create the menu for the tray.
// Also include the Tray from electon
const { app, BrowserWindow, Menu, screen, Tray } = require('electron');

app.on('ready', () => {
    appIcon = new Tray('public/favicon.png');

    const contextMenu = Menu.buildFromTemplate([
        { label: 'Show', click: () => window.show() },
        { label: 'Quit', click: () => {
            window.destroy();
            app.quit();
        }}
    ]);

    appIcon.setContextMenu(contextMenu);
});We need to import Tray from Electron. On the app.ready lifecycle, we can create it and attach a new context menu to it. To quit the application, we first have to destroy the window. Otherwise, we run into the preventDefault inside the close event.
How to Build the Application
And we’re all done. All that’s left to do is to bundle the application and build an executable file, preferably an installer so others can get it installed on their machine. There are a number of ways to go about this. In this tutorial, we will see, how it can be done using two additional packages: electron-packager and electron-winstaller. Install both them using npm i --save-dev, and add a new script into your package.json file:
"scripts": {
    "build:executable": "node scripts/build.js"
}Create this file under a new scripts folder, and add the following:
const packager = require('electron-packager');

async function build(options) {
    const appPaths = await packager(options);
    console.log(`✅ App build ready in: ${appPaths.join('\n')}`);
};

build({
    name: 'Memento',
    dir: './',
    out: 'dist',
    overwrite: true,
    asar: true,
    platform: 'win32',
    arch: 'ia32'
});This will create an executable version of your app. Let’s go over the options that are passed to build:
name: This will be the name of your applicaton. If it’s missing,electron-packagerwill try to use the value ofnamefrom yourpackage.jsonout: This specifies the directory where you want the packager to put the finished package.overwrite: By specifyingoverwrite, the packager will rewrite existing bundles, if the folder is not empty.asar: This will tell Electron Packager, to put your application’s source code into an archive. For production builds, it’s recommended to set this totrue.platform: This defines the target platform to build for. It can be eitherdarwin,linux,mas, orwin32, depending on which platform do you want to support.arch: This defines the target architecture to build for.
For a full list of available options, please refer to the official documentation of electron-packager. Among many things, this is where you can also set the overall look and feel, such as your app’s icon.
So far, this will only create the executable file, but won’t create an installer for this. This is where electron-winstaller comes into play. Modify your build script in the following way:
const packager = require('electron-packager');
const electronInstaller = require('electron-winstaller');

async function build(options) {
    const appPaths = await packager(options);

    console.log(`✅ App build ready in: ${appPaths.join('\n')}, creating installer...`);

    try {
        await electronInstaller.createWindowsInstaller({
            appDirectory: './dist/Memento-win32-ia32',
            outputDirectory: './dist/installer',
            authors: 'Weekly Webtips',
            description: 'Svelte app made with Electron',
            exe: 'Memento.exe'
        });

        console.log('💻 Installer is created in dist/installer');
    } catch (e) {
        console.log(`The following error occured: ${e.message}`);
    }
};

build({
    name: 'Memento',
    dir: './',
    out: 'dist',
    overwrite: true,
    asar: true,
    platform: 'win32',
    arch: 'ia32'
});Based on the output of the previous step, this will create an installer inside the folder, specified in outputdirectory. All of the options listed here are mandatory. Just as for electron-packager, there are also more options available for electron-winstaller. Please find them all on their GitHub repository. Run npm run build:executable, and you should have an executable version, as well as an installer ready for you to distribute inside your dist folder.

Conclusion
If you are already familiar with basic web technologies, building cross-platform apps are easier than you think. Once your project is set up, it is just like developing a web application. Yet here you have access to low-level APIs. If you don’t know how to access them, you can still look for available packages on npmjs. Just like we did for push notification and cron jobs.
If you would like to tweak around with the project — with CSS included — , you can clone it from GitHub. Thank you for your time, happy coding!

Rocket Launch Your Career
Speed up your learning progress with our mentorship program. Join as a mentee to unlock the full potential of Webtips and get a personalized learning experience by experts to master the following frontend technologies:
Courses


Recommended

10 Best Practices for Quickly Improving Your CSS