
All You Need to Know About React Hooks
React hooks introduced in 16.8 lets you use state and other features that previously were only possible with class components. It lets you write less and cleaner code, which results in a better bundle size, with that a better performance and overall a better developer experience as well.
In this tutorial, we are going to look through the most commonly used hooks in React. In order they are:
At the end of the tutorial, we will also be taking a look at how you can write custom hooks. Before jumping into looking at what each hook does, let’s see what are the rules of using them.

Rules of Hooks
When it comes to using hooks, there are two things you need to keep in mind. First and foremost, you can only use hooks in functional components.
// ✅ Valid use of hook
const hook = () => {
    const [state, setState] = useState({});
};

// ✅ Valid use of hook
function hook() {
    const [state, setState] = useState({});
}

// 🔴 Invalid use of hook
class Hook extends React.Component {
    const [state, setState] = useState({});
}Secondly, only call hooks at the top level of your function. You can’t call them conditionally, use them in loops or in nested functions.
// ✅ Valid use of hook
const hook = () => {
    const [state, setState] = useState({});
};

// 🔴 Invalid use of hook
const hook = () => {
    if (user.loggedIn) {
        const [state, setState] = useState({});
    }
};

// 🔴 Invalid use of hook
const hook = () => {
    searchResults.map(result => {
        const [state, setState] = useState(result);
    });
};To automatically enforce these rules in your project, you can use the eslint-plugin-react-hooks linter. These are the only two things to keep in mind. Without any further ado, let’s start by taking a look at the useRef hook.
The useRef Hook
So how do you actually use hooks in React? To start things off, let’s take a look at one of the simplest hooks in react, called useRef. useRef is mostly used for storing references to DOM elements. You may already be familiar with React.createRef from class-based components. This hook behaves in a similar way. Let’s take a look at an example:
import React, { useRef } from 'react';

const FocusInput = () => {
    const inputElement = useRef(null);

    const onClick = () => {
        inputElement.current.focus();
    };

    return (
        <React.Fragment>
            <input ref={inputElement} type="text" />
            <button onClick={onClick}>Focus input</button>
        </React.Fragment>
    );
};As you can see, each hook in React is a function that uses the “use” word as a prefix. You can import them from React and what you pass to useRef will be your default value. You can then pass the reference to useRef into a ref prop to assign it to an element. To see the hook in action, you can try out the example on CodeSandbox.


The useState Hook
Let’s take a look at a more commonly used hook, useState. It is the equivalent of setState in class components.
import React, { useState } from 'react';

const Input = () => {
    const [input, setInput] = useState('');
    const changeInput = e => setInput(e.target.value);

    return <input type="text" value={input} onChange={changeInput} />;
};Just as for useRef, whatever you pass to the function will be the initial value of your state. The function always returns an array with two elements:
- The first element will always be your state.
- The second element in the array will be a function that you can use to update your state.
In the example above, calling setInput with the value of e.target.value will update the input variable.
You can also use a function for the initial state:
const Input = () => {
    const [input, setInput] = useState(() => getComputationHeavyState());
    const changeInput = e => setInput(e.target.value);

    return <input type="text" value={input} onChange={changeInput} />;
};This is useful for computation heavy calculations. This is because it is only executed once instead of on every single render. You can pass an updater function to the setInput function too, like so:
const Input = () => {
    const [input, setInput] = useState('');
    const changeInput = e => setInput(e => e.target.value);

    return <input type="text" value={input} onChange={changeInput} />;
};In this case, it should return the updated value of the state.
Another important thing to know about is that unlike setState in class-based components, useState does not merge objects automatically. This means that if you have an object as a state, and you want to update a single property, you need to merge the rest of the objects manually.
// ✅ Valid use of objects with useState
const [state, setState] = useState({
    name: 'John Doe',
    email: '[email protected]'
});

setState({
    ...state,
    name: 'Jane Doe'
});

// 🔴 Wrong use of objects with useState
const [state, setState] = useState({
    name: 'John Doe',
    email: '[email protected]'
});

setState({ name: 'Jane Doe' });Note that in the second example, the setState will override the whole object, and only leave the updated property in it. To fix it, use the first approach.
Another approach is to simply use two useState hooks, and separate the two properties into two different states. You can use as many useState hooks as you’d like, there’s no limit on them.
const [name, setName]   = useState('John Doe');
const [email, setEmail] = useState('[email protected]');

setName('Jane Doe');
setEmail('[email protected]');So which approach should you take? It really depends and can be a personal preference. My approach is that if you have a complex state and you update multiple properties, go with an object. Otherwise split them up.
The useEffect Hook
useState is a great substitution of the setState function in class components. But what if you want to use lifecycle methods in functional components? You don’t have componentDidMount or componentWillUnmount in function-based components. With useEffect however, you can implement a similar behavior:
import React, { useState, useEffect } from 'react';

export default function App() {
    const [count, setCount] = useState(0);

    useEffect(() => {
        console.log('rendered');
    });

    return (
        <div className="App">
            <div>{Array(count).fill('🥑').join(',')}</div>
            <button onClick={() => setCount(count + 1)}>Add avocado</button>
        </div>
    );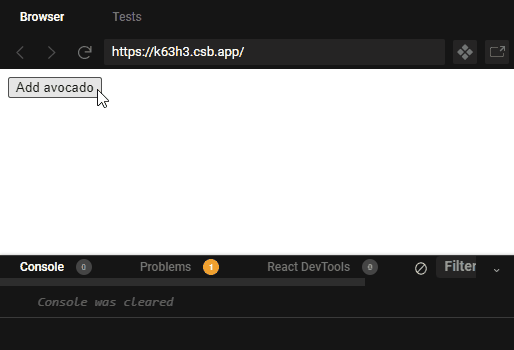
}As you can see, useEffect expects a callback function as a parameter. This example displays a list of avocados. Every time I click the button, the component gets re-rendered, and the function is called. So how can you make it so that it is only called once, like componentDidMount? You need to pass an empty array as the second parameter.
useEffect(() => {
    console.log('component mounted');
}, []);The second parameter of useEffect is a dependency array. This means that the effect does not depend on any props or state, so it should never re-run.
If you do need to update the component and run the effect on state or props change, you can pass them to your dependency array, and it will only get re-rendered if any of those values change.
useEffect(() => {
    console.log('rendered');
}, [count]);Be careful with changing dependencies inside the effect! This can cause infinite loops.
Also note, that when changes are made to the values inside the dependencies array, React does a shallow comparison, so keep that in mind when dealing with objects.
You can also extend the callback function inside the useEffect with a return statement to clean things up. You can think of things such as removing event listeners, unsubscribing from events, and making sure that unused memory is freed up.
useEffect(() => {
    console.log('component mounted');

    return () => {
        console.log('component unmounted');
    };
}, []);A common way for using the useEffect hook is to use it for fetching data. If you would like to learn more about how to fetch data using the useEffect hook, I suggest checking out the article below which goes into more detail.

The useCallback Hook
Next up, we have the useCallback hook. This hook is useful when you want to memoize a callback function, that only changes if one of its dependencies change. This can be used to optimize child components where you want to reduce the amount of re-renders because of a callback function. Take the following as an example:
import React, { useState } from 'react';

const Avocado = () => {
    const [count, setCount] = useState(0);

    const addAvocado = () => {
        setCount(count + 1);
    };

    return (
        <React.Fragment>
            <Addvocado add={addAvocado} />
            <div>{Array(count).fill('🥑').join(',')}</div>
        </React.Fragment>
    );
};

const Addvocado = ({ add }) => {
    console.log('component re-rendered');

    return <button onClick={add}>Add avocado</button>;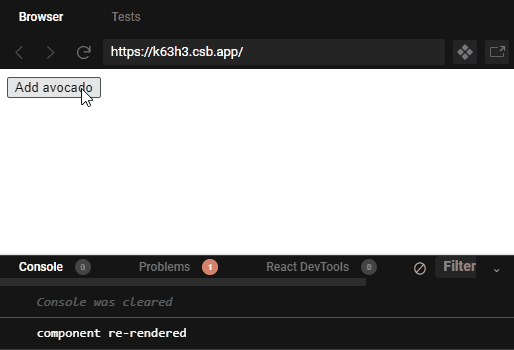
};In the example above, whenever you click the button, it increases the number of avocados by one. This re-renders the child component each time, even though there is no state change inside of it.
To fix this, we can use useCallback. Rewrite the addAvocado function in the following way:
import React, { useState, useCallback } from 'react';

...

const memoizedAddvocado = useCallback(() => {
    setCount((c) => c + 1);
}, [setCount]);This will only change the function, whenever setCount is changed. Now since the function is memoized this way, we can’t update the count using setCount(count + 1). Instead, we can make use of the updater function.
Now this alone won’t fix the issue, you also need to wrap the child component to React.memo to tell React, it should only be re-rendered if one of the passed props change. Change the Addvocado function to the following:
const Addvocado = React.memo(({ add }) => {
    console.log('component re-rendered');

    return <button onClick={add}>Add avocado</button>;
});Now the component renders only once. Keep in mind, however, that you should only optimize renders if the performance of your app degrades.
The useMemo Hook
Another React hook that can be used for optimization purposes is the useMemo hook. While useCallback memoize callbacks, useMemo can be used to memoize values.
import { useMemo } from 'react';

const memoizedValue = useMemo(() => getFibonacciArray(length), [length]);This hook expects a function that returns the computed value. The second parameter is again the dependency list, just as for other hooks.
Note that useMemo(() => fn, []) is equivalent to useCallback(fn, []).
Just as for useCallback, only use useMemo if you experience performance issues. Don’t optimize prematurely.
The useReducer Hook
Let’s take a look at two other more complex hooks. One of them is useReducer that is an alternative of useState. It is most useful when you are dealing with complex state. It works similar to Redux. It accepts two parameters, a reducer function and an initial state:
import { useReducer } from 'react';

const reducer = (state, action) => {

};

const App = () => {
    const [state, dispatch] = useReducer(reducer, initialState);

    return (...);
};And it returns two values. Your state, and a dispatch function that you can use to call the reducer function.
Note that you should define the reducer function outside of your component. This is a function that will hold all your logic of updating the state. This should be a pure function, so avoid mutating state. It accepts two parameters:
state: This will be your current state.action: This will get the value of whatever you pass into thedispatchfunction that is returned fromuseReducer.
It should always return your new state. So what goes inside the reducer function? Basically any logic that updates your state, but most commonly you’ll see a switch statement used in the following way:
const reducer = (state, action) => {
    switch (action.type) {
        case 'add':
            return state + 1;
        case 'remove':
            return state - 1;
        default:
            return state;
    }
};

const App = () => {
    const [state, dispatch] = useReducer(reducer, 0);

    return (
        <React.Fragment>
            <button onClick={() => dispatch({ type: 'add' })}>Addvocado</button>
            <button onClick={() => dispatch({ type: 'remove' })}>Removocado</button>
            <div>{Array(state).fill('🥑').join(',')}</div>
        </React.Fragment>
    );
};Anything you pass to dispatch, will be your action. Note that although we pass an object here, you can also pass primitives. The following is equivalent to the above:
const reducer = (state, action) => {
    switch (action) {
        case 'add':
            return state + 1;
        case 'remove':
            return state - 1;
        default:
            return state;
    }
};

const App = () => {
    const [state, dispatch] = useReducer(reducer, 0);

    return (
        <React.Fragment>
            <button onClick={() => dispatch('add')}>Addvocado</button>
            <button onClick={() => dispatch('remove')}>Removocado</button>
            <div>{Array(state).fill('🥑').join(',')}</div>
        </React.Fragment>
    );
};So when should you use useReducer and when should you use useState? In case you know you will be dealing with complex state, then go with useReducer. Otherwise, you can get away with useState.
The useContext Hook
Lastly, I wanted to cover the useContext hook, which makes use of the context API in React. If you used the context API before, useContext is equivalent to static context = UserContext in class-based component.
It lets you read a context that is shared between components, and subscribe to its changes. To see it in action, take the following example:
import React from 'react';
import { BrowserRouter, Route, Link } from 'react-router-dom';

import { UserProvider } from './Context';
import Dashboard from './Dashboard';
import Settings from './Settings';

export default function App() {
    const user = {
        name: 'John Doe',
        email: '[email protected]'
    };

    return (
        <BrowserRouter>
            <ul>
                <li><Link to="/">Dashboard</Link></li>
                <li><Link to="/settings">Settings</Link></li>
            </ul>
            <UserProvider value={user}>
                <Route path="/" exact component={Dashboard} />
                <Route path="/settings" component={Settings} />
            </UserProvider>
        </BrowserRouter>
    );
}Here we have two routes, a dashboard and a settings page. Both of the routes display only the title of the page:
import React from 'react';

export default () => <h1>Dashboard</h1>;I’ve wrapped these routes into a UserProvider component, which I’ve imported from UserContext.js. This file exports a new context and its provider:
import { createContext } from 'react';

const UserContext = createContext({});
const UserProvider = UserContext.Provider;

export { UserContext, UserProvider };To use this context with the useContext hook inside the routes, all you need to do, is import the context, and pass it into useContext hook:
import React, { useContext } from 'react';

import { UserContext } from './Context';

export default () => {
    const user = useContext(UserContext);

    return (
        <React.Fragment>
            <h1>Dashboard</h1>
            <span>Logged in as {user.name} ({user.email})</span>
        </React.Fragment>
    );
};You can use this state wherever you need it using useContext. To also allow changes to the state and update components where it is used, you can pass the user object to useState and pass its values down to the provider.
import React, { useState } from 'react';

export default function App() {
    const [state, setState] = useState(user);

    return (
        ...
        <UserProvider value={[state, setState]}>
            <Route path="/" exact component={Dashboard} />
            <Route path="/settings" component={Settings} />
        </UserProvider>
    );
}Then use it, where appropriate. If you now call setUser in one of your routes, the other routes will be updated too.
import React, { useContext } from 'react';

import { UserContext } from './Context';

export default () => {
    const [user, setUser] = useContext(UserContext);

    const changeEmail = () => {
        setUser({
            ...user,
            email: '[email protected]'
        });
    };

    return (
        <React.Fragment>
            <h1>Settings</h1>
            <span>Logged in as {user.name} ({user.email})</span>
            <br />
            <button onClick={changeEmail}>Change email</button>
        </React.Fragment>
    );
};If you need to optimize the number of renders, you can also throw a useMemo hook into the mix to add memoization.
Creating Custom Hooks
As mentioned at the beginning of this tutorial, I want to end things with a custom hook. React makes it possible to implement your own hooks to get the most out of them. To see how this can be done, let’s take a look at a common problem: displaying a loading state while data is fetched from an API. To keep it true to the naming convention, we will call it useFetch. To see how we want the hook to behave, let’s use it first, then we will write the function for it:
import React from 'react';

import useFetch from './useFetch';

const App = () => {
    const [post, loading] = useFetch("https://jsonplaceholder.typicode.com/posts/1");

    return (
        <div className="App">
            <div>{loading ? "loading..." : post}</div>
        </div>
    );
};We want to make it accept a URL, and it should return two things: the body of the post and a state about whether the data is loading. We then display either a loading message or the post itself. Now let’s see how this can be implemented. Create a new file called useFetch.js and add the following function:
import { useState, useEffect } from 'react';

export default url => {
    const [state, setState] = useState([null, false]);

    useEffect(() => {
        setState([null, true]);

        (async () => {
            const data = await fetch(url).then(res => res.json());

            setState([data.body, false]);
        })();
    }, [url]);

    return state;
};This custom hook uses useState and useEffect internally. When the useFetch is called, we set the loading flag to true, then after the response has arrived, we set it back to false, and set the null to the body of the response. Lastly, the state is returned from the function.
Note that you can’t directly make the useEffect hook’s callback function to async. Instead, I created an IIFE. Don’t forget to pass the url as a dependency to useEffect. And you’ve successfully created your very first custom React hook!
Summary
And that is everything you need to know about React hooks. If you’ve reached this far, you should now have a strong understanding of how hooks work, how and which you need to use for a given problem, or even how to create your own ones.
Do you have any additional thoughts about React hooks? Let us know in the comments below! Thank you for reading through, happy coding!
If you want to learn more about React, check out how you can use Suspense to further improve the way you fetch data:

Rocket Launch Your Career
Speed up your learning progress with our mentorship program. Join as a mentee to unlock the full potential of Webtips and get a personalized learning experience by experts to master the following frontend technologies:
Courses


Recommended

How to Create Dictionaries in JavaScript
How to Easily Make Donut Charts With CSS Only