Writing Your Very First Unit Test With Jest
Unit tests are an essential part of any large application. Their main job is to cover the smallest pieces of units like individual functions or methods. Essentially, the smallest testable component in your code. They test whether they work as intended.
Writing good unit tests is not as obvious as some people might think. For example, it’s not always clear what to test and what to not. How should you test the ones you should? And is it easily readable and understandable by others? Or even by you after a couple of months? — These are some of the questions you might have to answer to yourself when writing unit tests.

What are the Characteristics of Good Unit Tests?
Before writing any unit tests, we need to know what are the things we need to keep in mind in order to make them good.
First of all — as mentioned — good unit tests don’t test the obvious. For example, you should never test code that you didn’t write yourself. Testing framework functionality —whether life cycle methods in case of React — is just a waste of time. It is out of scope and should not be your responsibility.
Preferably, they should test the smallest testable component in your code: a function or a method. Pure functions are the best to test. If you need to write extensive mocking for a given test, then you most probably don’t need a unit test. Instead, it can be covered by an integration or acceptance test.
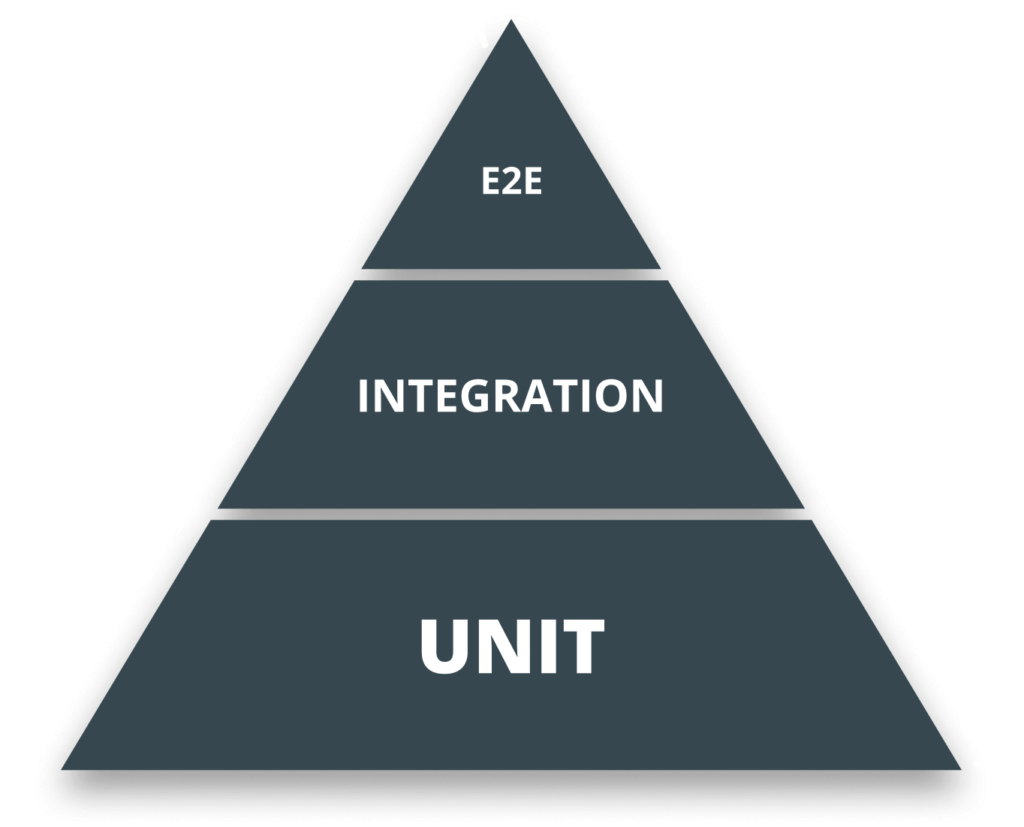
It’s also important to mention that the number of tests you will write for unit tests will be greater than the amount you write for integration. And the differences between unit and acceptance tests in terms of quantity will be even bigger.
Now you may ask — if I need to write so much code that’s not even going to be seen by the end-user, then what’s the point? What are the benefits? Is it really worth the time and effort?
Why Do We Need to Test Our Application?
So what are the benefits of writing unit tests?
By far the greatest return is that it will make your process more agile. It helps you with future changes as code that has been already implemented can be touched with confidence. In case your changes would likely cause a bug, it won’t reach production but will break your unit tests. This means that the quality of your code will increase as your test suite will catch bugs earlier, before making it to the end-user.
This also means the cost of bug fixing will be reduced down the line, as you know where to look and why your application breaks.
Now that we have this out of the way, let’s start by setting up the project and pulling in Jest.

Setting Up the Project
Imagine we have a calculator made in React. We want to write some tests for covering the functionality of adding, subtracting, multiplying, and dividing. To speed up the process, I have a create-react-app boilerplate ready in my code editor and some functions for which we can write the tests:
class AppController {
    add(a, b)       { return a + b };
    subtract(a, b)  { return a - b };
    multiply(a, b)  { return a * b };
    divide(a, b)    { return a / b };
}

const appController = new AppController;

module.exports = appController;It is imported into App.js.
This is the structure of my project with everything in place, after bootstrapping create-react-app. Nothing has changed, I only added the AppController.js file which will we cover with tests.

To start writing tests in Jest, we first need to get the dependency. Run npm i jest to install it. Once ready, we can add a script to our package.json file which will run Jest for us:
{
    "scripts": {
        ...
        "unit": "node ./tests/unit/run.js --config=tests/unit/config.js"
    }
}Now every time we run npm run unit, it will call the run.js file which will execute Jest. We can also specify a config file. Let’s see first what’s inside run.js and then we will see what we need to further configure it.
const jest = require('jest');
const argv = process.argv.slice(2);

jest.run(argv);To make Jest run the test files we only need three lines of code. First I imported Jest itself, then I extracted the arguments from the CLI. In this example, the argv will represent the config file.
The config file will be responsible for determining which files to run.
module.exports = {
    rootDir: '../..',
    testURL: 'http://localhost',
    testEnvironment: 'jsdom',
    testMatch: [
        '<rootDir>/tests/unit/*.(spec|test).(j|t)s'
    ]
};The testMatch property will search for test files in the specified location. Since I created a separate directory for the tests and created a sub-directory for unit tests specifically, we need to step back two directories. Specifying the rootDir will help us point the testMatch to the root of our project.
I also used some regex so it will match for both .spec and .test files as well as either .js or .ts extensions.
Now with everything configured, if you run npm run unit, you will get an error saying “No tests found…” so let’s create one!

Writing Your First Unit Test
Let’s create a new file inside tests/unit called AppController.spec.js. In order to test it, we need to import the file first.
const appController = require('../../src/appController');

describe('Testing the appController', () => {
    it('should add two numbers together', () => {

    });

    it('should substract the second number from the first one', () => {

    });

    it('should multiply the two numbers together', () => {

    });

    it('should divide the first number with the second', () => {

    });
});After importing I’ve used two function calls:
describeis used for grouping related tests together. For example, here we are writing tests for a single class.itis used for specifying a test that we should run against our code. This is where the checks will go.
The names are important. You should always strive to be descriptive. These are going to be display in your CLI whenever you run the tests. If anything fails, you’ll easily spot which test is the culprit.
So for every method, we have a test. Let’s see what kind of exceptions we can write for them:
it('should add two numbers together', () => {
        expect(appController.add(2, 2)).toBe(4);
        expect(appController.add(5, 5)).toBe(10);

        expect(appController.add(3, 2)).toBe(5);
        expect(appController.add(2, 3)).toBe(5);

        expect(appController.add(-5, 5)).toBe(0);
        expect(appController.add(-5, -5)).toBe(-10);
        expect(appController.add(-5, -5)).not.toBe(10);

        expect(appController.add(1.01, 1.02)).toBe(2.0300000000000002);
    });

    it('should substract the second number from the first one', () => {
        expect(appController.subtract(2, 2)).toBe(0);
        expect(appController.subtract(6, 4)).toBe(2);
        expect(appController.subtract(4, 6)).toBe(-2);

        expect(appController.subtract(4, 6)).not.toBe(2);

        expect(appController.subtract(1.01, 1.02)).toBe(-0.010000000000000009);
    });

    it('should multiply the two numbers together', () => {
        expect(appController.multiply(2, 2)).toBe(4);
        expect(appController.multiply(3, 2)).toBe(6);
        expect(appController.multiply(2, 3)).toBe(6);
        expect(appController.multiply(0, 1)).toBe(0);
    });

    it('should divide the first number with the second', () => {
        expect(appController.divide(2, 2)).toBe(1);
        expect(appController.divide(3, 4)).toBe(0.75);

        expect(appController.divide(4, 3)).toBe(1.3333333333333333);
        expect(appController.divide(4, 3)).not.toBe(1.3);

        expect(appController.divide(1, 0)).toBe(Infinity);
    });
});As you can see, we can come up with various cases. To test each method, we can use the expect function. We pass in the method we want to test and then verify what the output value should or should not be.
For example, we can test whether the function produces the same output given the same params but their order switched. We can test for negative numbers and exceptions for the number 0. In case of divide, we can test what happens if we divide by 0.
The Jest documentation is pretty extensive, you can get a good look on what are some other available matchers for expect.
Running the test now, everything should turn green.
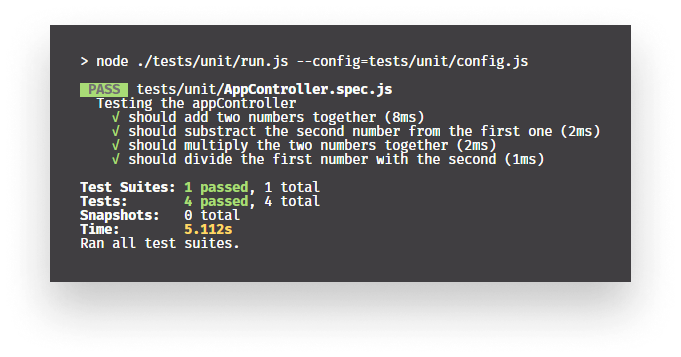
But what if we change this:
expect(appController.divide(4, 3)).not.toBe(1.3);Into this:
expect(appController.divide(4, 3)).toBe(1.3);And we truly want it to be rounded to 1 single decimal? It’s not a mistype in our test, this is how we want our function to work. Our test suite will catch the error and the test will fail. It will produce the following, describing exactly what it was expecting and what did it receive.

Now you can be confident that if you were to ever cause a bug, it will be caught by Jest allowing your users to experience a bug-free version of your application.
Conclusion
These tests can be plugged into a CI before deployment or you can even use husky to run it as a pre-commit hook. So your code won’t even make it into the repository if it breaks something.
You can now safely deploy your app knowing nothing will break. Or in case it does, you still have a chance to fix it before it reaches users.
If you would like to play around with the finished project, you can clone it from GitHub. Thank you for taking the time to read this article, happy testing!

Rocket Launch Your Career
Speed up your learning progress with our mentorship program. Join as a mentee to unlock the full potential of Webtips and get a personalized learning experience by experts to master the following frontend technologies:
Courses

JavaScript Unit Testing

Unit Testing for TypeScript and Node.js Developers

Testing Next.js Apps with Jest
Recommended
Writing Your Very First Neural Network in JavaScript
Looking into Svelte 3