How to E2E Test Your Application With Cypress
You are done with everything and your app is ready to be finally shipped to production. However, you’re not finished yet. Testing is just about to start.
If I say testing is the most hated part among developers, I’m probably closer to the truth than I believe. But it is an essential part of the development cycle. In order to make your application bullet and bugproof, you need to have a testing suite in place.
You would start by writing as many unit tests as you can, to increase code coverage. But what about after that? Shouldn’t we test the whole user flow from end to end?
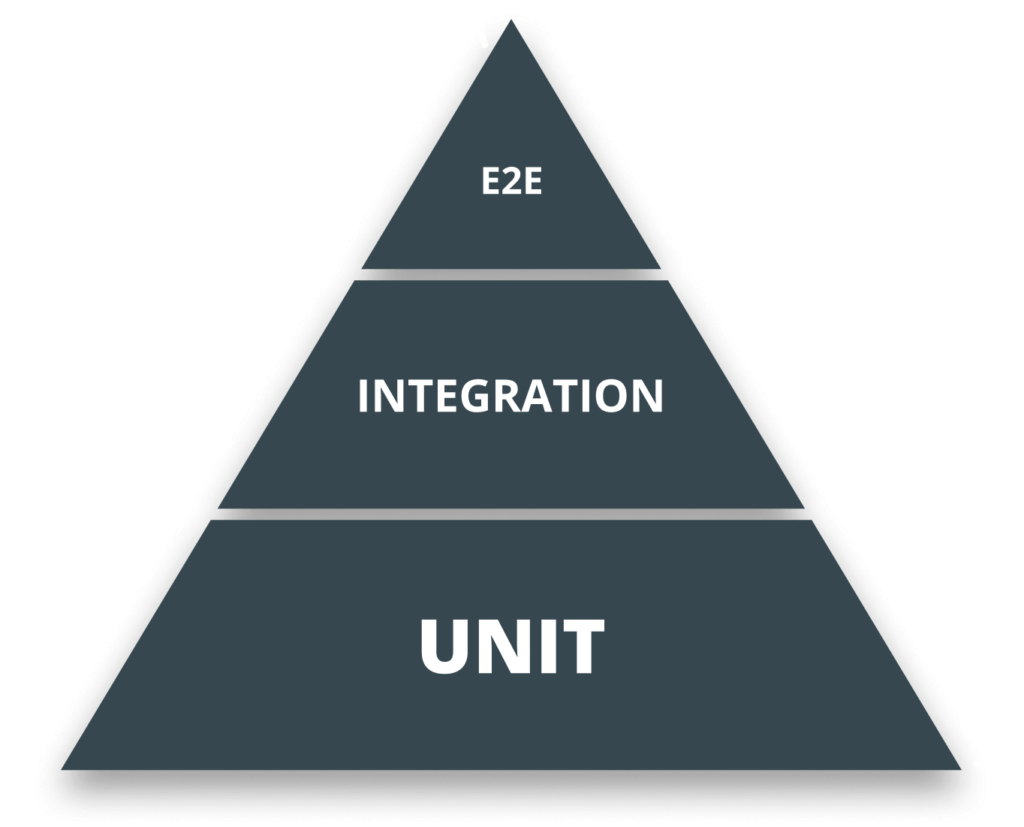
This is where E2E testing comes into play. This time I would like to give you an introduction to Cypress, the all-in-one E2E testing framework.
By the end of this tutorial, you should be able to write your own test cases and use Cypress to its full potential. We will look into how to set everything up, how Cypress is structured, and how we can use it to create basic user scenarios. So let’s first start by getting Cypress into our project and setting everything up.

Setting Up Cypress
First and foremost, you need to pull down Cypress with npm i cypress --save-dev. It may take some time, but probably this will be the longest step in setting up the framework.
After the installation, now you can open Cypress by running node_modules\.bin\cypress open. To make things easier, let’s add this as an npm script into your package.json file:
{ "name": "cypressio", "version": "1.0.0", "description": "", "main": "index.js", "scripts": { "cypress": "node_modules\\.bin\\cypress open" }, "keywords": [], "author": "", "license": "ISC", "devDependencies": { "cypress": "4.0.2" }}Make sure you escape the backslashes. Now you should be able to run Cypress by typing npm run cypress into your command line.
Cypress will generate a cypress.json configuration file for you in your project root directory as well as a cypress folder containing multiple sub-folders. Let’s examine what each of these folders does.
The Structure of Cypress
First you have the configuration file, cypress.json — This is where you can modify the default behavior of Cypress. Things, such as setting a base URL, env variables, or the path of the folders where your test files will live. For a full list of options, you can refer to the configuration page under their official documentation. We also have four different folders:
Fixtures
Fixtures are used for loading in a fixed set of data. This is useful for mocking responses. Say your app communicates with an API. You can mock network responses with the use of fixures.
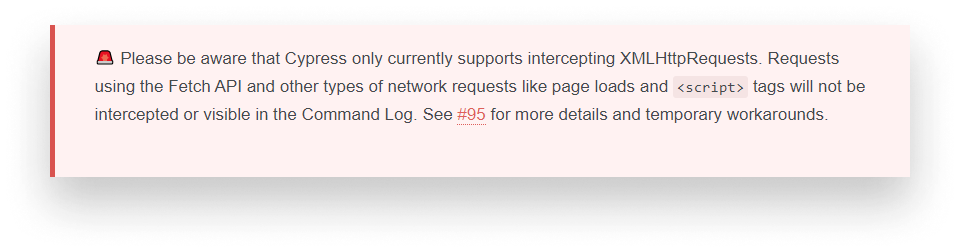
One thing to note; Cypress currently only supports intercepting XHR requests, you need workarounds if you are using the Fetch API:
Integration
This is where all your test files will go. You can configure the location to be in another directory in your cypress.json file. You’ll also get a bunch of generated example tests to get familiar with the syntax and the available commands.
Plugins
The plugins folder is used for modifying or extending the functionality of Cypress. Say your app is using TypeScript and is built using Webpack. By hooking into the file:preprocessor event, you can resolve your modules the right way.
Support
Lastly, the support folder is used for adding custom commands to Cypress — or modifying existing ones — that can be used throughout your tests.
This folder structure is only an example. You can always change things up and configure locations via cypress.json. And now that we are familiar with how Cypress is built up, we can start looking into how to write test cases.

Writing Your Very First Test
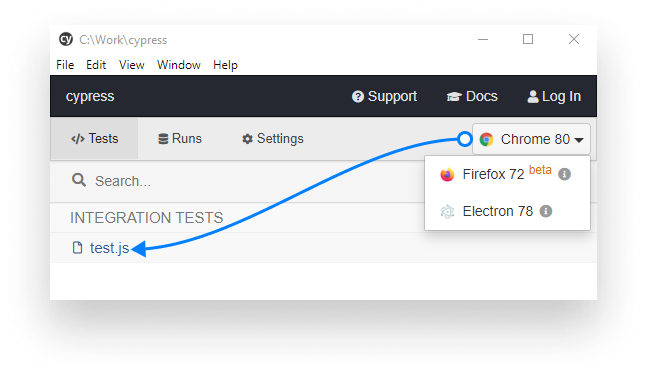
First, let’s get rid of everything in the integration folder and start Cypress by running npm run cypress. You’ll see that it has found no files. So let’s create one.

Create a new file called test.js. It should appear immediately in Cypress. Let’s say we want to test the official website of Cypress. You can write test cases just as you would for unit tests. Let’s start by outlining the different interactions we want to test:
describe('Testing Cypress.io', () => {
    it('Closing banners should close banners', () => {

    });

    it('Nagivation should navigate to the corresponding pages', () => {

    });

    it('Subscribing should not work if there\'s no email provided', () => {

    });
});First, we need to navigate to cypress.io. We can do that by specifying a before block that will be executed before all tests:
before(() => {
    cy.visit('https://cypress.io');
});The global cy object can be used to do the heavy lifting for us. Apart from visiting pages or getting elements, it is used for all kinds of user interactions. Such as clicking, typing or even verifying assertions.
When you open the front page, two banners appear. Say we want to test if we can close them. Click on test.js inside Cypress to run it. You can also choose to use different browsers.
To close the banners, you want to test the presence of the elements and trigger a click event. To get elements you can use — apart from the traditional methods — the built-in “Selector Playground” button.
Copying it to the clipboard will generate a cypress selector for you. Triggering a click even is as easy as calling click() on it. After saving the file, Cypress automatically reruns the test and we can see that the bottom banner disappears as it should. So let’s do the same for the banner on the top and also verify if it is indeed hidden.
it('Closing banners should close banners', () => {
    // Testing top banner
    cy.get('.close-top-banner-btn')
      .should('be.visible')
      .click()
      .should('not.exist');

    // Testing cookie consent
    cy.get('.cookieConsent').should('be.visible');
    cy.get('.button').click();
    cy.get('.cookieConsent').should('not.exist');
});As you can see, we can chain actions one after another. We can verify expectations by calling should. The assertions will also appear on the left-hand side inside the browser.
You can interact with them and see the events reflected in the browser. Moving on, we have the navigation. To test the navigation we want to get the navigation buttons and check if the URL contains the correct words.
it('Nagivation should navigate to the corresponding pages', () => {
    // Navigating to "Features"
    cy.get('.styled__NavItem-sc-16oj5lj-4').eq(0).click();
    cy.url().should('include', 'features');

    // Navigating to "How it works"
    cy.get('.styled__NavItem-sc-16oj5lj-4').eq(1).click();
    cy.url().should('include', 'how-it-works');

    // Navigating to "Dashboard"
    cy.get('.styled__NavItem-sc-16oj5lj-4').eq(2).click();
    cy.url().should('include', 'dashboard');

    // Navigating to "Pricing"
    cy.get('.styled__NavItem-sc-16oj5lj-4').eq(3).click();
    cy.url().should('include', 'pricing');
});When we want to get different elements with the same class name, we can use eq(n) which is similar to the nth-child selector in CSS. We can use the same logic for the last test. We need to click on the subscribe button, then we can verify if the input element next to it receives a class:
it('Subscribing should not work if there\'s no email provided', () => {
    cy.get('.hs-input').should('not.have.class', 'error');
    cy.get('.hs-button').click();
    cy.get('.hs-input').should('have.class', 'error');
});If we run the test, we can see how the site is being controlled and interacted with by an emulated user:
Summary
And you’ve just created your very first E2E With Cypress! Cypress offers a lot. I’ve been using it for quite some time now, and the wide selection of functionality lets you test some really advanced scenarios. It also has great documentation and a large community behind it. Therefore, if you happen to get stuck, you will most probably find a solution to your problem.
As a last word, I would like to get your attention on one thing we did throughout the tutorial which could deem as an anti-pattern. Try to avoid using class selectors to get elements. These can often change, which will break your tests. Instead, I would advise to use custom data attributes which only purpose is to act as a hook for testing.
I hope you’ll give Cypress a try and it makes your testing workflow a little bit easier just as it did for me. If you would like to take a look at the finished project, you can clone it from GitHub. Take care and happy testing.


Rocket Launch Your Career
Speed up your learning progress with our mentorship program. Join as a mentee to unlock the full potential of Webtips and get a personalized learning experience by experts to master the following frontend technologies:
Courses


Recommended
Introduction to Push Notifications
Web Scraping with Cypress with a Practical Example