How to Create a Memory Game in JavaScript
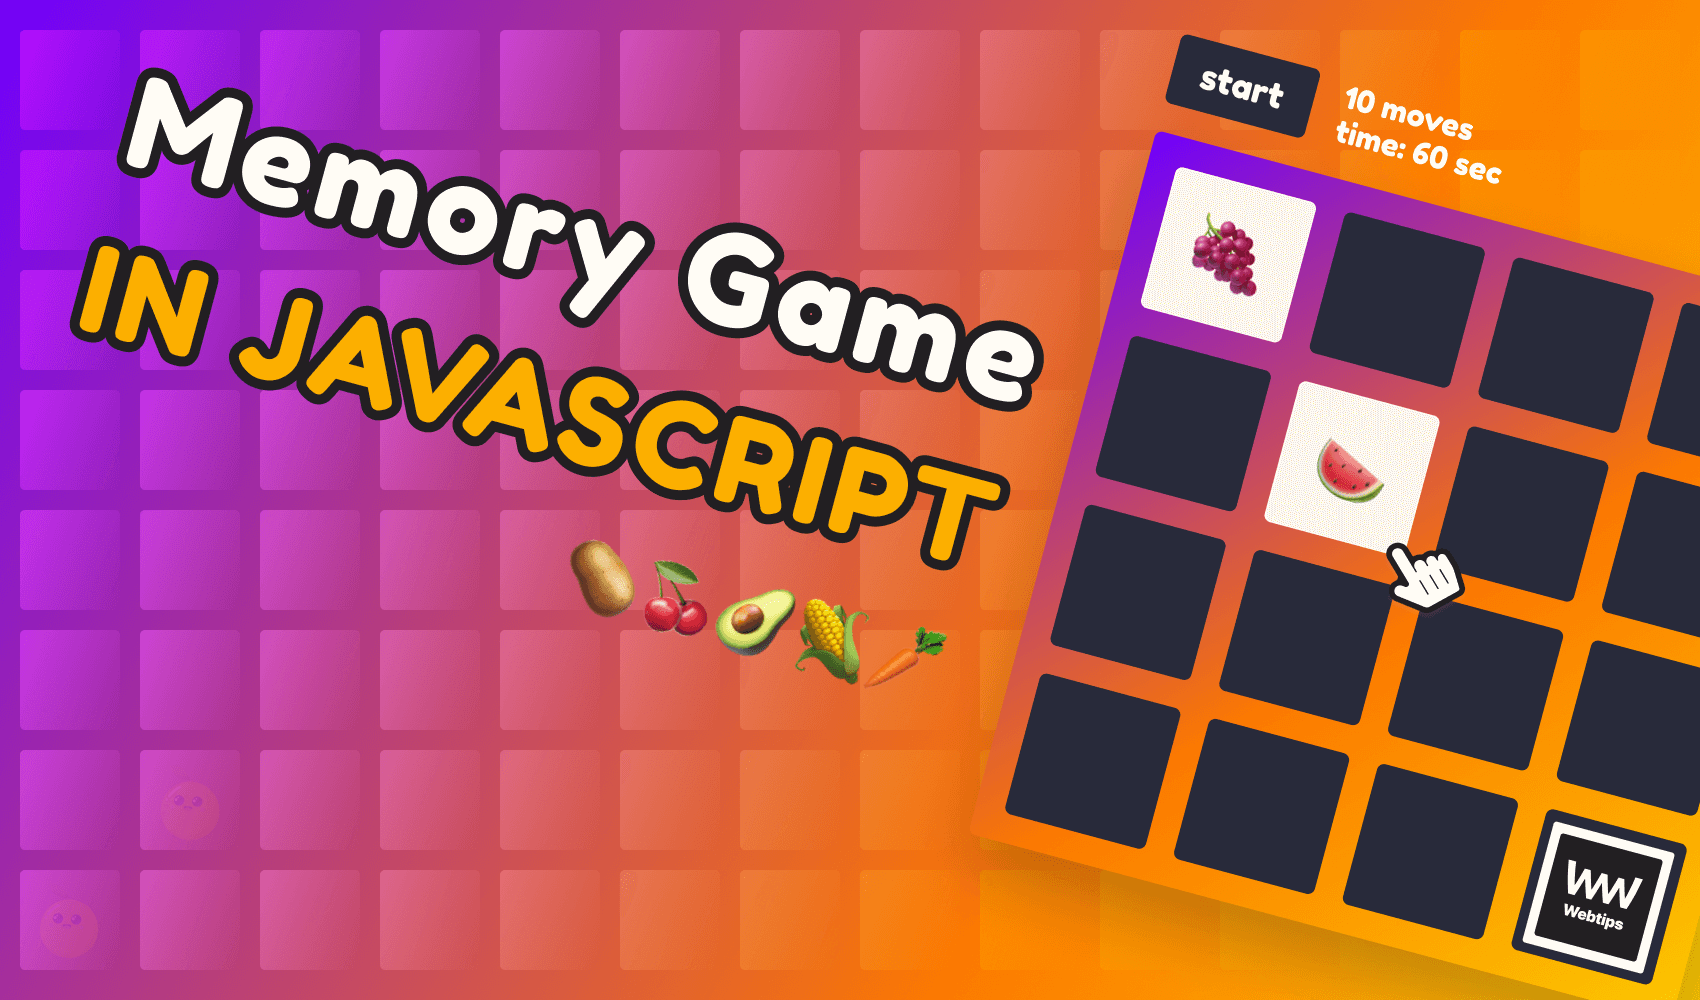
Building a memory game can not only improve your JavaScript knowledge but can also help you improve your memory. In this project, we will be looking at creating a grid of cards, that can be flipped over and matched. If a match is found, the cards stay flipped, if not, they will turn back. The game continues until all cards are flipped.
The entire project is hosted on GitHub if you would like to get the code in one piece. By the end of this tutorial, we will have the following game:

Setting Up the Project
Let’s start off by setting up the project. In a new folder, create the layout for the game, in a new index.html file:
<!DOCTYPE html>
<html lang="en">
    <head>
        <meta charset="UTF-8">
        <meta http-equiv="X-UA-Compatible" content="IE=edge">
        <meta name="viewport" content="width=device-width, initial-scale=1.0">
        <title>🧠 Memory Game in JavaScript</title>

        <link rel="stylesheet" href="assets/styles.css" />
        <script src="assets/game.js" defer></script>
    </head>
    <body>
        <div class="game">
            <div class="controls">
                <button>Start</button>
                <div class="stats">
                    <div class="moves">0 moves</div>
                    <div class="timer">time: 0 sec</div>
                </div>
            </div>
            <div class="board-container">
                <div class="board" data-dimension="4"></div>
                <div class="win">You won!</div>
            </div>
        </div>
    </body>
</html>
Everything will go into a .game container. We will show the number of moves (each click will represent one move), and the time it takes to complete the game. There are two other things to note for this project:
- The
.boardelement has adata-dimensionattribute. We will use this to programmatically generate the board so that we can quickly configure the size of it. By default, we will go with 4x4. - There are also two assets linked to the document, a stylesheet and the entry point for the game. Make sure you have these files ready in a folder called
assets.
Styling the Board
Let’s focus our attention on styling the board. I won’t be covering all CSS rules, you can find the full stylesheet in the GitHub repository, but I will point out some important parts that we need to keep in mind.
For one, I’m using a custom playful font that you can either download from the GitHub repository or get from Google Fonts. To use fonts in CSS, you want to declare a new font face in the following way:
@font-face {
    font-family: Fredoka;
    src: url(./FredokaOne-Regular.ttf);
}

// Later you can reference it like so:
font-family: Fredoka;
We are also dead-centering the board to the screen, this can be done using absolute positioning and transforms:
.game {
    position: absolute;
    top: 50%;
    left: 50%;
    transform: translate(-50%, -50%);
}
Lastly, make sure that for the “Start” button, you add the following rules to make it show the correct cursor when it is being hovered:
I have also created a .disabled state, as we are going to disable the button later on when we start the game through JavaScript.
Flipping Cards with CSS
The last thing we need to cover from the CSS side is how to flip the cards. First, let’s see what will be generated into the .board to understand what elements we will need to work with:
<div class="board" data-dimension="4">
    <div class="card">
        <div class="card-front"></div>
	<div class="card-back">🥔</div>
    </div>
</div>
For each card, we are going to need 3 div elements:
- One for the container for which we are going to add some dimensions
- One for the front of the card — this will be facing us initially, a blank card
- One for the back of the card — this will be facing away from us, hiding what emoji is written on the card
To flip the cards around, we will be using the transform property. For the .card itself, we can add some dimensions:
.card {
    position: relative;
    width: 100px;
    height: 100px;
    cursor: pointer;
}
Make sure you also add cursor: pointer here as well to show that the cards are interactive. For the front and back of the cards, we will need the following rules:
.card-front,
.card-back {
    position: absolute;
    border-radius: 5px;
    width: 100%;
    height: 100%;
    background: #282A3A;
    transition: transform .6s cubic-bezier(0.4, 0.0, 0.2, 1);
    backface-visibility: hidden;
}
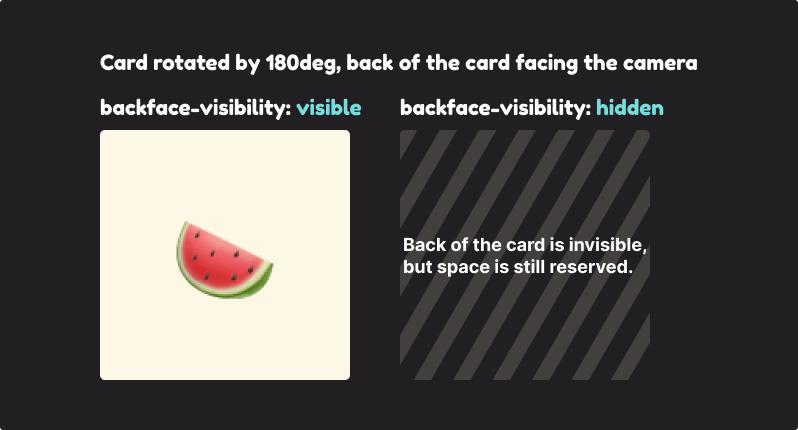
The most important part here is the last two rules. We need to use a transition on the transform property to create an animation once we flip the cards. I’m using a cubic-bezier here for the easing. I recommend checking out easings.net and cubic-bezier.com if you want to experiment with different easing functions. The other important rule is backface-visibility. This is used for telling CSS that the back of an element should not be visible to us. This means we won’t see the emoji if the card is flipped.
To rotate the cards into the correct position, add the following rules to your CSS file:
.card-back {
    font-size: 28pt;
    text-align: center;
    line-height: 100px;
    background: #FDF8E6;
    transform: rotateY(180deg) rotateZ(50deg);
    user-select: none;
}

.card.flipped .card-front {
    transform: rotateY(180deg) rotateZ(50deg);
}

.card.flipped .card-back {
    transform: rotateY(0) rotateZ(0);
}
Make sure you set user-select to none as we don’t want the text to be selectable. This will rotate the back of the card 180 degrees away from us. We can use a helper class called .flipped to set the rotate back to 0 and set the rotate for the front of the card to 180 degrees.
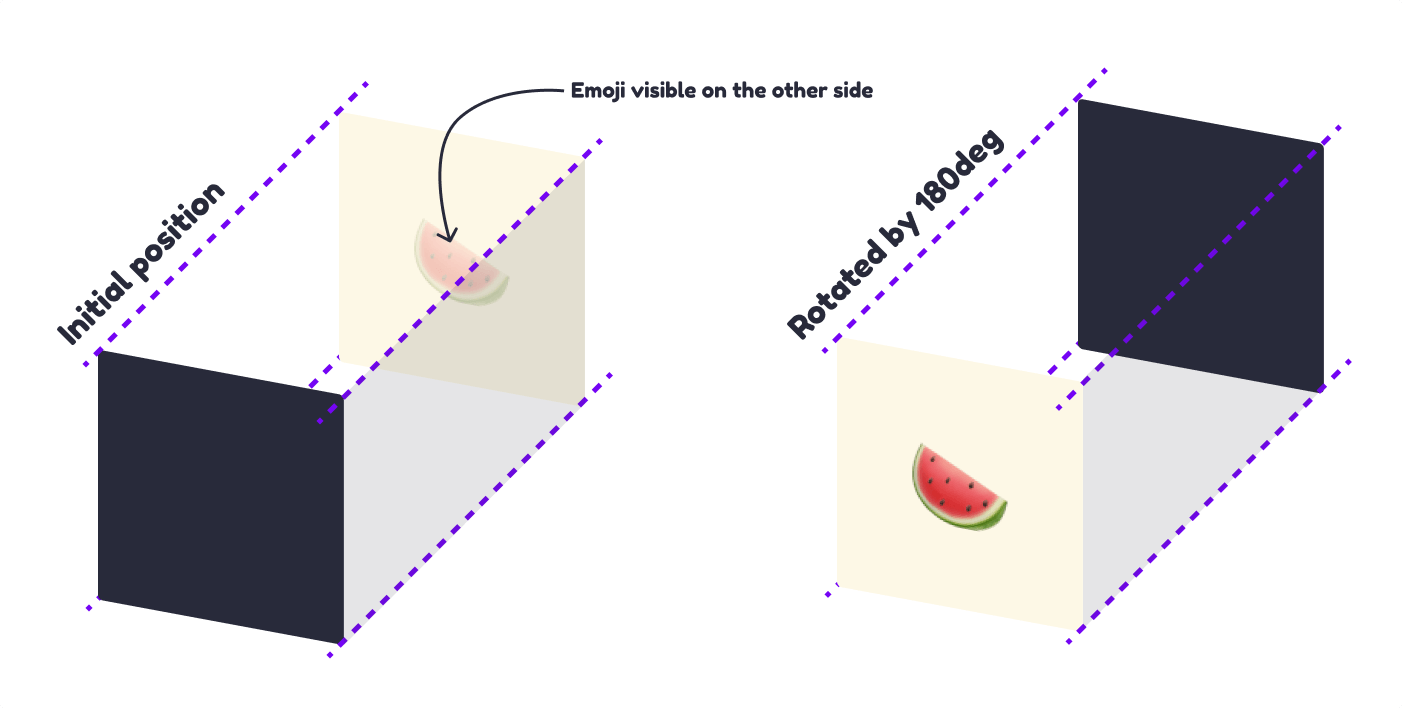
The same rules are used for the entire board so that when the player wins, the entire board is flipped to its back.

Creating the Game
We have the layout, we have the styles, now let’s look into implementing the game itself. First, let’s define some selectors, and the game’s state:
const selectors = {
    boardContainer: document.querySelector('.board-container'),
    board: document.querySelector('.board'),
    moves: document.querySelector('.moves'),
    timer: document.querySelector('.timer'),
    start: document.querySelector('button'),
    win: document.querySelector('.win')
}

const state = {
    gameStarted: false,
    flippedCards: 0,
    totalFlips: 0,
    totalTime: 0,
    loop: null
}
This will help us reuse selectors multiple times. For the state of the game, we need to keep track of 5 different values:
- A boolean flag for telling if the game has started (by either clicking on the “Start” button, or on one of the cards)
flippedCardswill be used to keep track of the number of flips. Only two cards can be flipped at a time. If the flips are a match, they will be kept flipped over. If it’s a mismatch, they will be flipped back.totalFlipsandtotalTimewill keep track of the total number of moves and the elapsed time since the game started, respectively.- The
loopis for the game loop itself, that will update the timer every 1 second.
Generating the board
The next step would be to generate the board based on the data-dimension attribute. For this, we can create a new function called generateGame, and call it at the end of the file:
const generateGame = () => {
    const dimensions = selectors.board.getAttribute('data-dimension')

    if (dimensions % 2 !== 0) {
        throw new Error("The dimension of the board must be an even number.")
    }

    const emojis = ['🥔', '🍒', '🥑', '🌽', '🥕', '🍇', '🍉', '🍌', '🥭', '🍍']
    const picks = pickRandom(emojis, (dimensions * dimensions) / 2)
    const items = shuffle([...picks, ...picks])
    const cards = `
        <div class="board" style="grid-template-columns: repeat(${dimensions}, auto)">
            ${items.map(item => `
                <div class="card">
                    <div class="card-front"></div>
                    <div class="card-back">${item}</div>
                </div>
            `).join('')}
       </div>
    `

    const parser = new DOMParser().parseFromString(cards, 'text/html')

    selectors.board.replaceWith(parser.querySelector('.board'))
}
As a first step inside the function, we want to make sure that the dimension we passed is an even number. To check this, we can simply use a remainder. This variable can be used later to dynamically set the style of the board inside a template literal. To add this to the DOM, I’m using a DOMParser
And to generate random items from the array of emojis, I’m using two custom functions here:
pickRandom: for picking random items from an array. We want to pick items fromemojis, and we want to pick half the items of the dimension. For example, if the dimension is set to 4, then the grid will have 16 items (4x4), so we want to pick 8 random elements from the array. This is because we need two pairs for each emoji, so we pass[...picks, ...picks]for shuffling.shuffle: for shuffling the array, so their order will be random each time the page is reloaded.
Shuffling arrays
const pickRandom = (array, items) => {
    const clonedArray = [...array]
    const randomPicks = []

    for (let index = 0; index < items; index++) {
        const randomIndex = Math.floor(Math.random() * clonedArray.length)

        randomPicks.push(clonedArray[randomIndex])
        clonedArray.splice(randomIndex, 1)
    }

    return randomPicks
}
The pickRandom function — after cloning the original array — loops through the passed array for n number of times (represented by items), and gets an item from it at a random position, then returns the randomPicks at the end of the function. This is then forwarded to the shuffle function, which uses the Fisher-Yates shuffling algorithm. Let’s first see the pseudo-code for the algorithm, so we know how to implement it in JavaScript:
-- To shuffle an array a of n elements (indices 0..n-1):

for i from n−1 downto 1 do

   j ← random integer such that 0 ≤ j ≤ i

   exchange a[j] and a[i]
This means we need three main steps:
- From
ito the<length of the array> - 1, all the way down to 1, we want to:- create a random integer, one that is greater than 0, but less than the index. Let’s call it
j - then exchange the random index with
iso thatarray[i] = array[j]andarray[j] = array[i]
- create a random integer, one that is greater than 0, but less than the index. Let’s call it
This means the shuffle function should look like the following:
const shuffle = array => {
    const clonedArray = [...array]

    for (let index = clonedArray.length - 1; index > 0; index--) {
        const randomIndex = Math.floor(Math.random() * (index + 1))
        const original = clonedArray[index]

        clonedArray[index] = clonedArray[randomIndex]
        clonedArray[randomIndex] = original
    }

    return clonedArray
}
So we get a descending for loop, in which we create a random index using Math.random and Math.floor (since Math.random returns a random number between 0 and 1). This can be used to switch the position of two items in the array.
Note that we need to store the original indexed value in a variable, to prevent it overwriting with clonedArray[randomIndex].
This will get us the board generated with random emojis every time, but we still can’t flip the cards, so let’s add the necessary event listeners.
Adding event listeners
We are going to need two different event listeners, one for the cards, and one for the start button. Add a new function at the end of your file, and call it after generating the game:
const attachEventListeners = () => {
    document.addEventListener('click', event => {
        const eventTarget = event.target
        const eventParent = eventTarget.parentElement

        if (eventTarget.className.includes('card') && !eventParent.className.includes('flipped')) {
            flipCard(eventParent)
        } else if (eventTarget.nodeName === 'BUTTON' && !eventTarget.className.includes('disabled')) {
            startGame()
        }
    })
}

generateGame()
attachEventListeners()
Since the cards will be added dynamically to the DOM, we want to delegate the event listeners, instead of adding them directly on the cards. This is why we need to attach it on the document, and then based on the class names, we can decide which function to call:
flipCardwith the.carditself. We only call this function if the card hasn’t been flipped yet.startGame, if the “Start” button is clicked, and it is not disabled.
Note that we have the following in our DOM, so the click event will be triggered on .card-front, instead of .card, that’s why we need to pass eventParent, instead of eventTarget to the flipCard function.
<div class="card">
    <div class="card-front"></div>
    <div class="card-back">${item}</div>
</div>
Starting the game
Let’s first take a look at starting the game, and then we will see how to flip the cards. For this, we are going to need a new startGame function, that sets the correct game state:
const startGame = () => {
    state.gameStarted = true
    selectors.start.classList.add('disabled')

    state.loop = setInterval(() => {
        state.totalTime++

        selectors.moves.innerText = `${state.totalFlips} moves`
        selectors.timer.innerText = `time: ${state.totalTime} sec`
    }, 1000)
}
First, we set the gameStarted flag to true. We can use this flag in other parts of our application to tell if the game is running. We also want to disable the “Start” button to prevent starting the game over and over again, after it has already been started.
We are also going to need a loop, running every 1 second to update the UI with the total number of flips, and total time elapsed. Note that you will need to assign this interval to state.loop, so that later when the game is finished, we can clear it.
Flipping cards functionality
To correctly flip the cards, we are going to need a little bit more code, but nothing too complicated:
const flipCard = card => {
    state.flippedCards++
    state.totalFlips++

    if (!state.gameStarted) {
        startGame()
    }

    if (state.flippedCards <= 2) {
        card.classList.add('flipped')
    }

    if (state.flippedCards === 2) {
        const flippedCards = document.querySelectorAll('.flipped:not(.matched)')

        if (flippedCards[0].innerText === flippedCards[1].innerText) {
            flippedCards[0].classList.add('matched')
            flippedCards[1].classList.add('matched')
        }

        setTimeout(() => {
            flipBackCards()
        }, 1000)
    }
}
First, we need to update the state. Every time there is a flip, we want to increment both flippedCards and totalFlips. Then for the rest of the logic, we need to define individual if statements:
- First, we want to check if the game has already started. If not, we can call the
startGamefunction. This part is optional, but this way, the player can also start the game by simply clicking on one of the cards. - Then we want to check if
flippedCardsis less than, or equal to two. At any given time, we don’t want to allow the player to flip more than 2 cards simultaneously. If there are no more than two cards flipped, we can flip it by adding the.flippedclass to thecardthat we pass to the function. - Lastly, we want to check if there are exactly two cards flipped over. In this case, we need to do two different things. Either it will be a match, or a mismatch:
- First, we get the
.flippedcards that are not matched already, then check the emoji inside the first card, against the emoji inside the second card usinginnerText. If they match, we match the cards by adding a.matchedclass to them. - Secondly, we flip back all cards after 1 second. So what is this function doing?
- First, we get the
const flipBackCards = () => {
    document.querySelectorAll('.card:not(.matched)').forEach(card => {
        card.classList.remove('flipped')
    })

    state.flippedCards = 0
}
Nothing more, than getting all the cards that are not matched, and removing the .flipped class from it then sets the flippedCards state back to 0, so that we can continue flipping up two cards at a time.
Winning
All that’s left to do is to create the winning state for the game. For this, extend your flipCard function with the following if statement:
// If there are no more cards that we can flip, we won the game
if (!document.querySelectorAll('.card:not(.flipped)').length) {
    setTimeout(() => {
        selectors.boardContainer.classList.add('flipped')
        selectors.win.innerHTML = `
            <span class="win-text">
                You won!<br />
                with <span class="highlight">${state.totalFlips}</span> moves<br />
                under <span class="highlight">${state.totalTime}</span> seconds
            </span>
        `

        clearInterval(state.loop)
    }, 1000)
}
This will check if all cards have been flipped already. If there are no more cards that haven’t been flipped, we know the game has been completed, so we can show the winning state, by flipping the entire board. Don’t forget to clear the loop at the end of the function.
Summary
And that’s how you can create your own memory game in JavaScript. I hope you learned some new things in this tutorial. If you are further interested in game development, make sure to also check out the following tutorials that dive into other aspects of game development:
- How to Recreate Tic-Tac-Toe
- How to Remake Mario
- How to Remake Chrome's Dino
- Building The Game Breakout
- How I Made A Snake Game Out Of Checkboxes
If you would like to get the code in one piece, you can clone the project from its GitHub repository. Thank you for reading through, happy coding!

Rocket Launch Your Career
Speed up your learning progress with our mentorship program. Join as a mentee to unlock the full potential of Webtips and get a personalized learning experience by experts to master the following frontend technologies:
Courses


Recommended
12 JavaScript Game Ideas with Source Code
The State of CSS in 2021