
What is Astro? — Introduction to Static Site Generators
Static site generation is not a new concept, with numerous well-established generators designed to provide a good developer experience while delivering end users lightweight, fast pages. In this tutorial, we'll see what Astro brings to the table and how it compares to other static site generators. First, what is Astro?

Key Features of Astro
Astro is a web framework that initially began as a static site generator (SSG). While it now supports other rendering methods, its primary strength lies in functioning as an SSG. Its key features include:
- UI-agnostic: One of its biggest advantages compared to other SSGs, is that Astro is UI-agnostic. This means you can build an Astro project with your favorite frameworks, such as React, Preact, Svelte, Vue, Solid, Lit, and AlpineJS.
- Exceptional performance: Thanks to its zero JavaScript approach and island architecture, Astro also comes with an extremely fast page load.
- Customizable: Astro uses Vite under the hood, which means that Vite-specific build options are also available. Moreover, Astro has its own API for building integrations. There are more than 100 integrations to choose from to speed up your work.
- Easy to deploy: Thanks to its rich ecosystem, it comes with many integrations to help with deploying your site to the cloud with ease.
Let's go through these points in more detail to see some practical examples of how Astro functions. But first, how do we set up a new Astro project?
How to Setup Astro
To get started, run one of the following commands in your terminal within the desired project folder:
# Using NPM
npm create astro@latest

# Using PNPM
pnpm create astro@latest

# Using Yarn
yarn create astroUpon running the command, you may be prompted to install the create-astro command. Type y in the terminal and press enter to proceed.
You'll then be asked to name the folder where you want to bootstrap the project. The setup involves steps like selecting a template or configuring TypeScript. Choose the options that suit your use case to complete the setup. For a faster process, let Astro handle the installation of dependencies and Git setup.

Now, navigate to your directory and run npm run dev to start Astro. Using the recommended template, you'll find sample files in the project to help you get more familiar with Astro.

Astro's project structure
As Astro uses Vite, its project structure closely resembles Vite projects. Each Astro project includes the following necessary files and folders:
public
src
├─ components
├─ layouts
├─ pages
astro.config.mjspublic: At the project root, thepublicfolder holds static assets that are needed as-is. Astro won't modify files in this folder; instead, it copies them to the build folder without bundling or minification.src: All project-related files are in thesrcfolder, organized into subfolders for better readability and maintainability:components: Astro adopts a component-based approach, where each component is created in thecomponentsfolder.layouts: If your project requires multiple layouts, they can be created in a separatelayoutsfolder. Layouts in Astro act as regular components, so whether you created them here or in thecomponentsfolder will ultimately depend on your preference.pages: Astro uses a file-based routing approach, where routes must be created insrc/pages. The filename determines the route, and for the homepage, Astro uses anindex.astrofile.
astro.config.mjs: Astro also comes with its own configuration file at the project's root, where we can configure builds or add integrations. By default, it exports an empty configuration object:
import { defineConfig } from 'astro/config'

// Anything inside the object will act as a configuration
// We'll look at some configuration options shortly
export default defineConfig({})How to Use With Different Frameworks
To use your preferred framework, Astro provides commands to automatically install necessary integrations. Run one of the commands below in your Astro project to install the required dependencies:
| Framework | Command |
|---|---|
| React | npx astro add react |
| Preact | npx astro add preact |
| Svelte | npx astro add svelte |
| Vue | npx astro add vue |
| Solid | npx astro add solid |
| Lit | npx astro add lit |
| AlpineJS | npx astro add alpinejs |
Running one of the above commands will do three things:
- Installs necessary dependencies (e.g.,
reactandreact-dom). - Updates Astro's configuration by adding the framework as a dependency.
- Updates TypeScript's configuration if applicable.
import { defineConfig } from 'astro/config'
import react from '@astrojs/react'

export default defineConfig({
  integrations: [react()]
})

// The same setup is done for other frameworks too
// Svelte example:
import { defineConfig } from 'astro/config'
import svelte from '@astrojs/svelte'

export default defineConfig({
  integrations: [svelte()]
})Based on the above example, we can now start using React in Astro. To test it out, we can create a new React component in the components folder, just like we would in React:
import React, { useState } from 'react'

export const Counter = () => {
    const [count, setCount] = useState(0)

    return (
        <React.Fragment>
            <h1>{count}</h1>
            <button onClick={() => setCount(count - 1)}>-</button>
            <button onClick={() => setCount(count + 1)}>+</button>
        </React.Fragment>
    )
}To import this component into an Astro component, we can use a regular import statement at the top of the component, calling it just like we would in React to display it:
Note that the import statement is wrapped between a code fence (---). This is called the component script in Astro. Its syntax is based on frontmatter from Markdown. Anything within the code fence is executed on the server only, not on the client.
While this example renders a counter on the page, it won't work initially due to Astro's zero JavaScript approach. To bundle JavaScript for components and make them interactive, we need to explicitly tell Astro to make the component interactive using special Astro directives.
What are Astro Islands?
Interactive components marked with a client directive in Astro are called Astro Islands. These elements will bundle the necessary JavaScript for a project to make them work. To make the Counter component function, we can change the code according to the following:
---
import { Counter } from '../components/Counter';
---

<Counter client:load />The above example uses a custom client directive specific to Astro. There are different levels of priority we can use for client directives. The above example uses a high-priority directive, meaning the component will be hydrated (made interactive) on page load. The following client directives are available in Astro:
<Counter client:load /> <!-- High priority -->
<Counter client:idle /> <!-- Medium priority -->
<Counter client:visible /> <!-- Low priority -->
<Counter client:media="(max-width: 800px)" /> <!-- Low priority -->
<Counter client:only="react" /> <!-- Load on the client -->client:load: The highest priority client directive, which hydrates the component immediately on page load. It's useful for elements needing immediate interactivity, such as above-the-fold elements.client:idle: A medium-priority client directive, which will hydrate components after the initial load. It runs hydration after therequestIdleCallbackevent is fired. This is useful for components that don't need to be interactive immediately.client:visible: A low-priority client directive. It'll hydrate components only when they enter the viewport. It can be used for off-screen components that are not initially visible. It usesIntersectionObserverinternally to track the visibility of elements.client:media: Another low-priority client directive that can be used to hydrate components based on screen size. For example, if an element is only visible on mobile, then it won't be hydrated on desktop.client:only: We can also opt-in to render a component only on the client using theclient:onlydirective. This is useful for highly interactive elements where rendering them statically doesn't make sense. For example, showing user information only after a login. Note that we must pass the framework Astro should use to hydrate the component.
The benefits of Astro Islands
So why do we have to explicitly mark components as interactive in Astro? What are the benefits? While this may seem like writing extra code for no reason, this approach has a number of benefits:
- Improved performance: Every part of the page not flagged with a client directive is built as static HTML, which optimizes performance by leaving only the absolute necessary bytes in files. JavaScript is loaded only for components with a client directive.
- Prioritize loading: Different priority levels allow intuitive prioritization, letting Astro handle the heavy lifting. For example, setting
client:visiblefor off-screen elements avoids blocking more critical, above-the-fold elements. - Better readability: The approach also helps us better understand which parts of the page are interactive, and what components contribute to our overall bundle size.
<!DOCTYPE html>
<html lang="en">
    <head>...</head>
    <body>
        <Header />
        <Search client:load />
        <main>
            <Sidebar />
            <article>...</article>
        </main>
        <Footer />
        <Popup client:load />
    </body>
</html>Note that client directives can only be used in Astro components.
How to Customize Through Vite
As Astro uses Vite under the hood, all Vite-related configurations are available in Astro. While Astro projects work with an empty configuration, let's explore some commonly used options to improve our build:
import { defineConfig } from 'astro/config'

import react from '@astrojs/react'
import sitemap from '@astrojs/sitemap'
import compress from 'astro-compress'

export default defineConfig({
    site: 'https://webtips.dev/',
    outDir: 'build',
    integrations: [
        react(),
        sitemap(),
        compress()
    ]
})Two frequently used configuration options are site and outDir. The site property defines the full URL for our site, aiding Astro in generating a sitemap.
The outDir property specifies where we want to build the project; by default, Astro generates files into a folder called dist, but this can be configured through the outDir property. The above example also includes two popular integrations that enhances SEO and performance:
sitemap: An integration for automatically generating a sitemap for the project based on the routes. This helps search engines index our pages.compress: This integration can be used to compress build assets, such as HTML, CSS, JavaScript, or images. This helps improve performance by reducing file sizes.
Note that all integrations in Astro are called as functions.
To use these integrations, install them as dependencies by running the following commands in the terminal:
# Adding the sitemap integration
npx astro add sitemap  # Using NPM
yarn astro add sitemap # Using Yarn
pnpm astro add sitemap # Using PNPM

# Adding the compress integration
npx astro add astro-compress  # Using NPM
yarn astro add astro-compress # Using Yarn
pnpx astro add astro-compress # Using PNPM
Usually, integrations can also be further customized by passing a configuration object to the function. For example, we can configure the compress integration to specify which files to compress:
// This will only compress images
compress({
  CSS: false,
  HTML: false,
  Image: true,
  JavaScript: false,
  SVG: true,
}),Astro provides many more configuration options, all well-documented in their official documentation. If you're looking for a specific integration, explore their official library for built-in or community-built options.
Ease of Deployment
Last but not least, Astro also comes with several adapters for third-party services that can be used to deploy an Astro project in minutes.
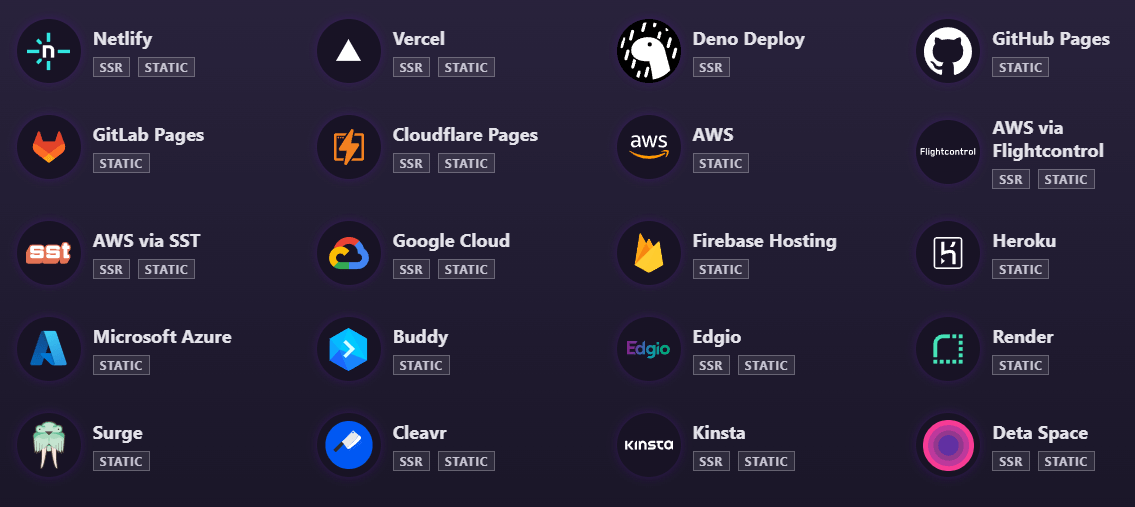
Complete steps on how to install and use an adapter can be found in Astro's official documentation. However, to demonstrate their ease of use, let's take a look at a popular example and see how we could deploy a site to Netlify.
By default, Astro will generate a static site, for which we don't need any extra configuration to make it work on Netlify. However, if we want to server-side render Astro, we'll need to use an adapter. First, we need to install the adapter by running the following command:
npx astro add netlifyThis will do two things: install the @astrojs/netlify dependency and update the astro.config.mjs file to include the adapter:
import { defineConfig } from 'astro/config'
import netlify from '@astrojs/netlify/functions'

export default defineConfig({
  output: 'server',
  adapter: netlify(),
})Note that when using Astro for SSR, we need to set the output option to server. Now whenever we run a deployment on Netlify, the server-side functionalities will work. Adapters can also be configured just like integrations. For example, to make use of Netlify's Edge Functions, we can modify the adapter according to the following:
import { defineConfig } from 'astro/config'
import netlify from '@astrojs/netlify/functions'

export default defineConfig({
  output: 'server',
  adapter: netlify({
    edgeMiddleware: true
  })
})Most adapters follow a similar installation step, which means we can configure and connect Astro with our desired service in minutes.
Summary
In conclusion, Astro is a great option for generating static sites. Being UI-agnostic, migrations from different tech stacks can be achieved without the need to rewrite existing components. Being truly static, it outperforms popular SSG frameworks that also ship framework-specific JavaScript code.
It has a thriving ecosystem with plenty of integrations and adapters that can be used to deploy an Astro project in minutes. Have you had any experience with Astro? Leave your thoughts in the comments below! Thank you for reading!
 Access 100+ interactive lessons
- Unlimited access to hundreds of tutorials
- Prepare for technical interviews
Courses


Recommended
Astro vs JSX — What are the Differences?

The Building Blocks of Astro Components